Manuals › Equipment › Logbook configuration
Logbook configuration
This guide requires you to be elevated.
Step 1
Move your mouse to the left side of the screen to show the navigation bar.
Step 2
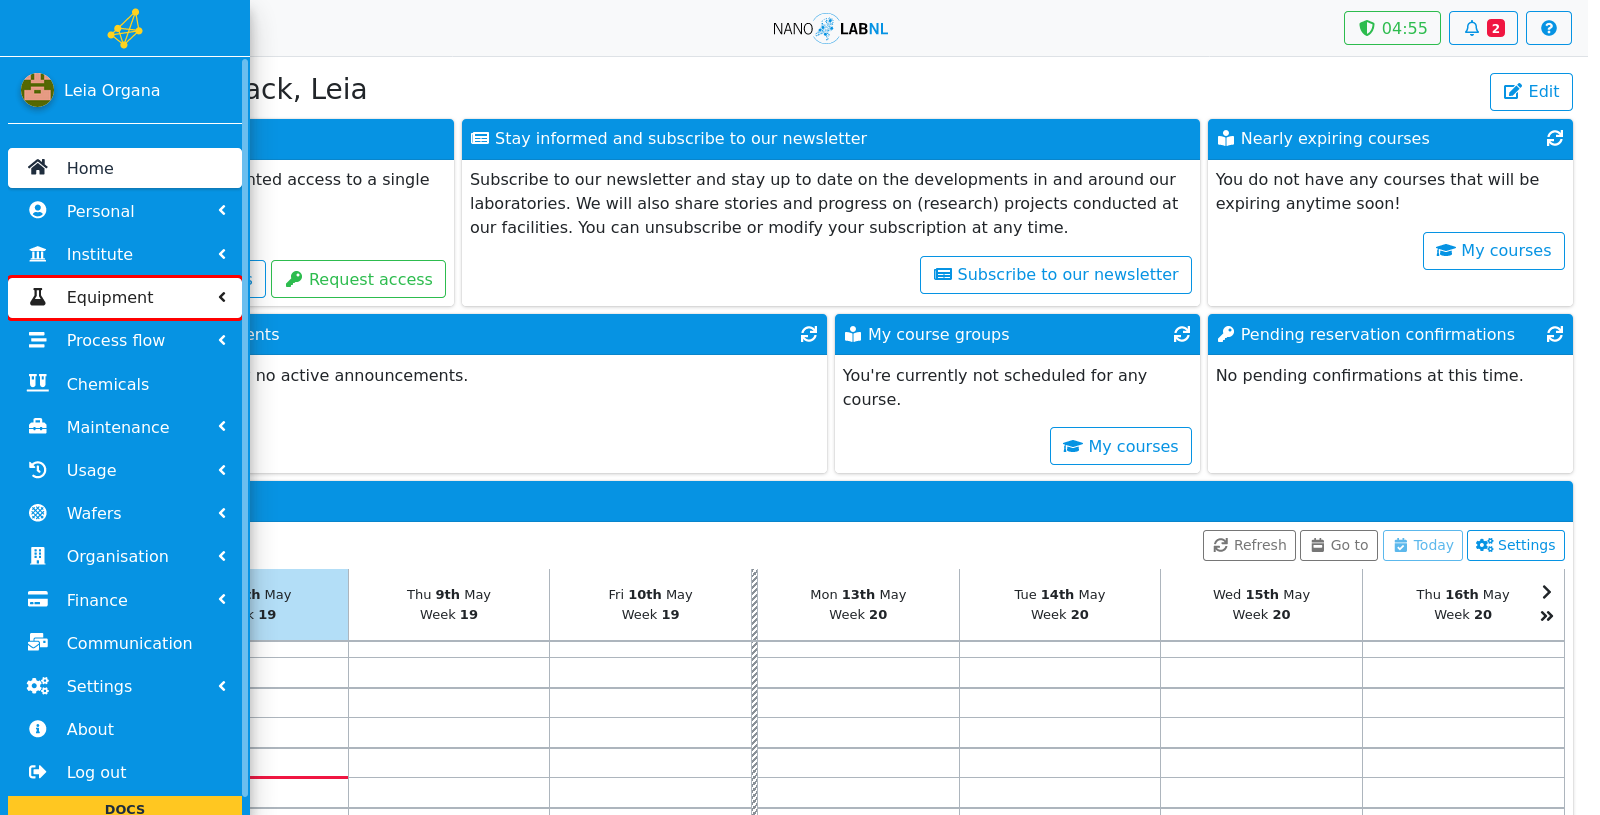
Click "Equipment".
Step 3
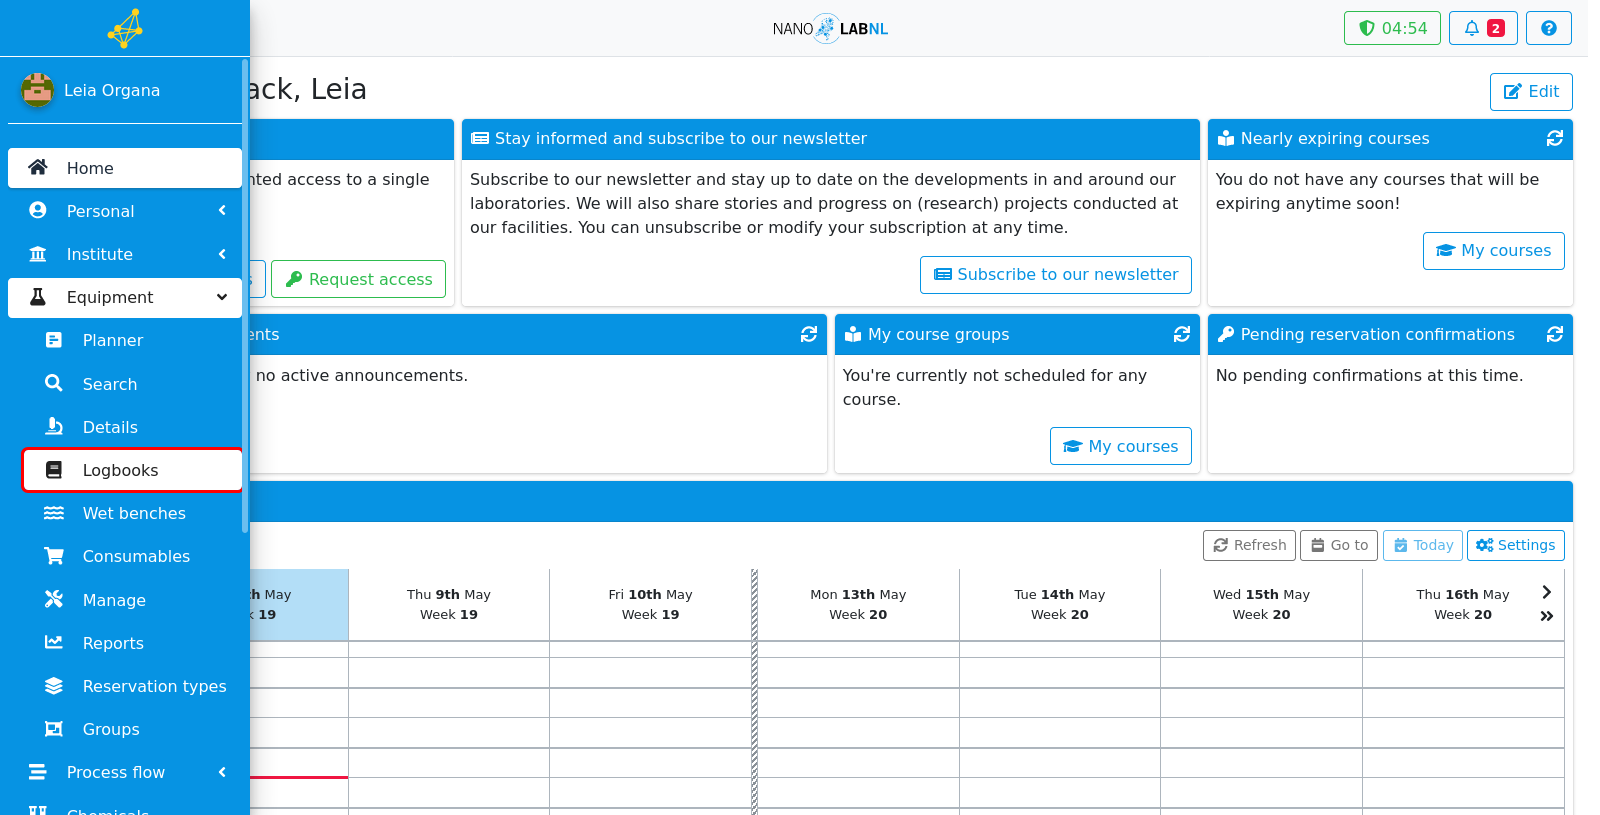
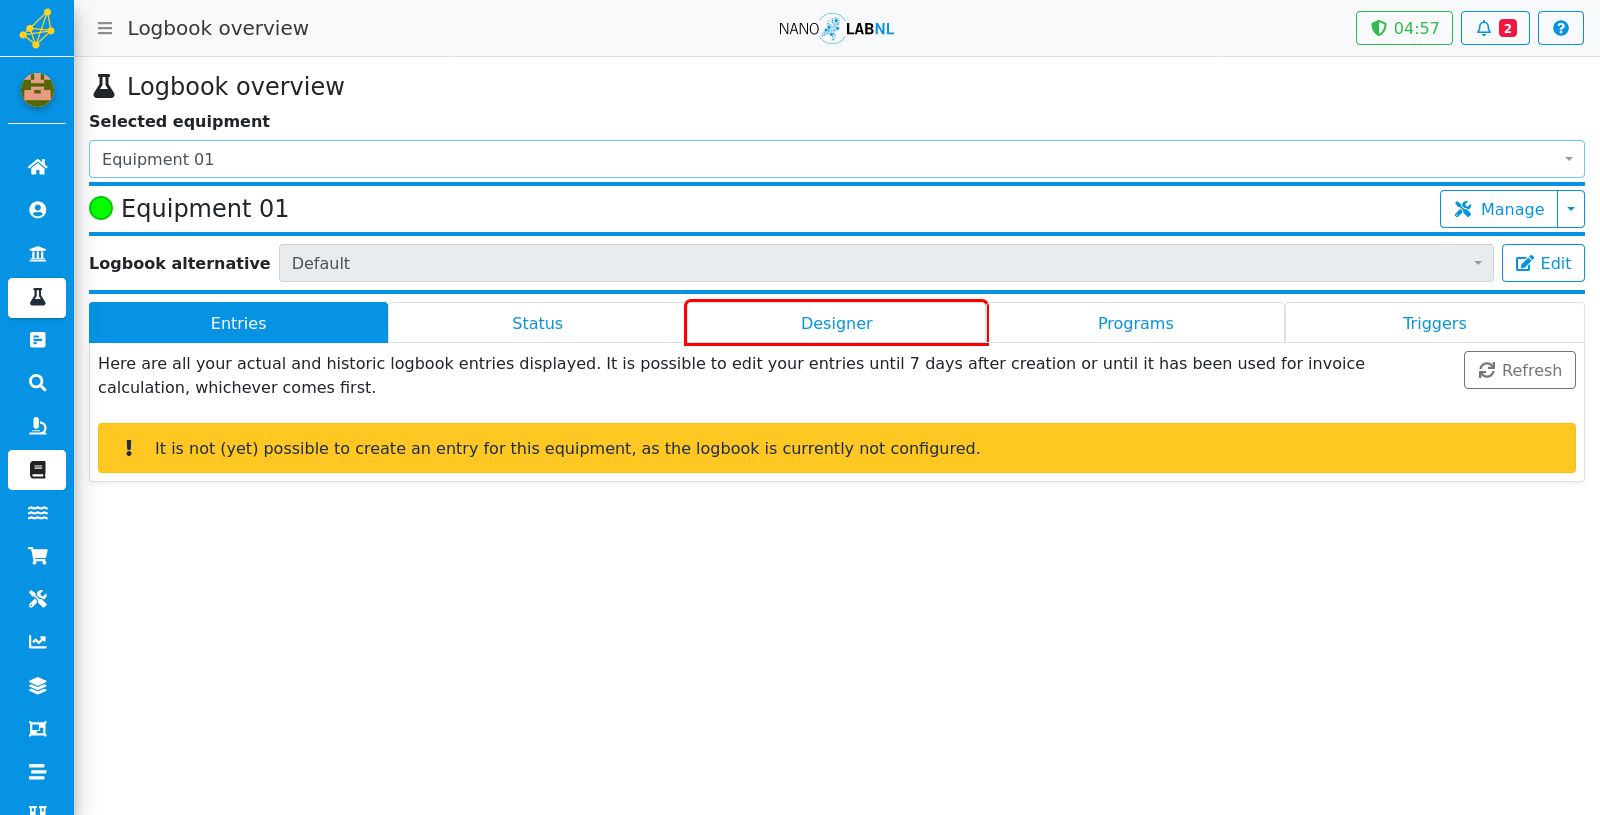
Click "Logbooks".
Step 4
To configure a new logbook version, go to the "Designer" tab.
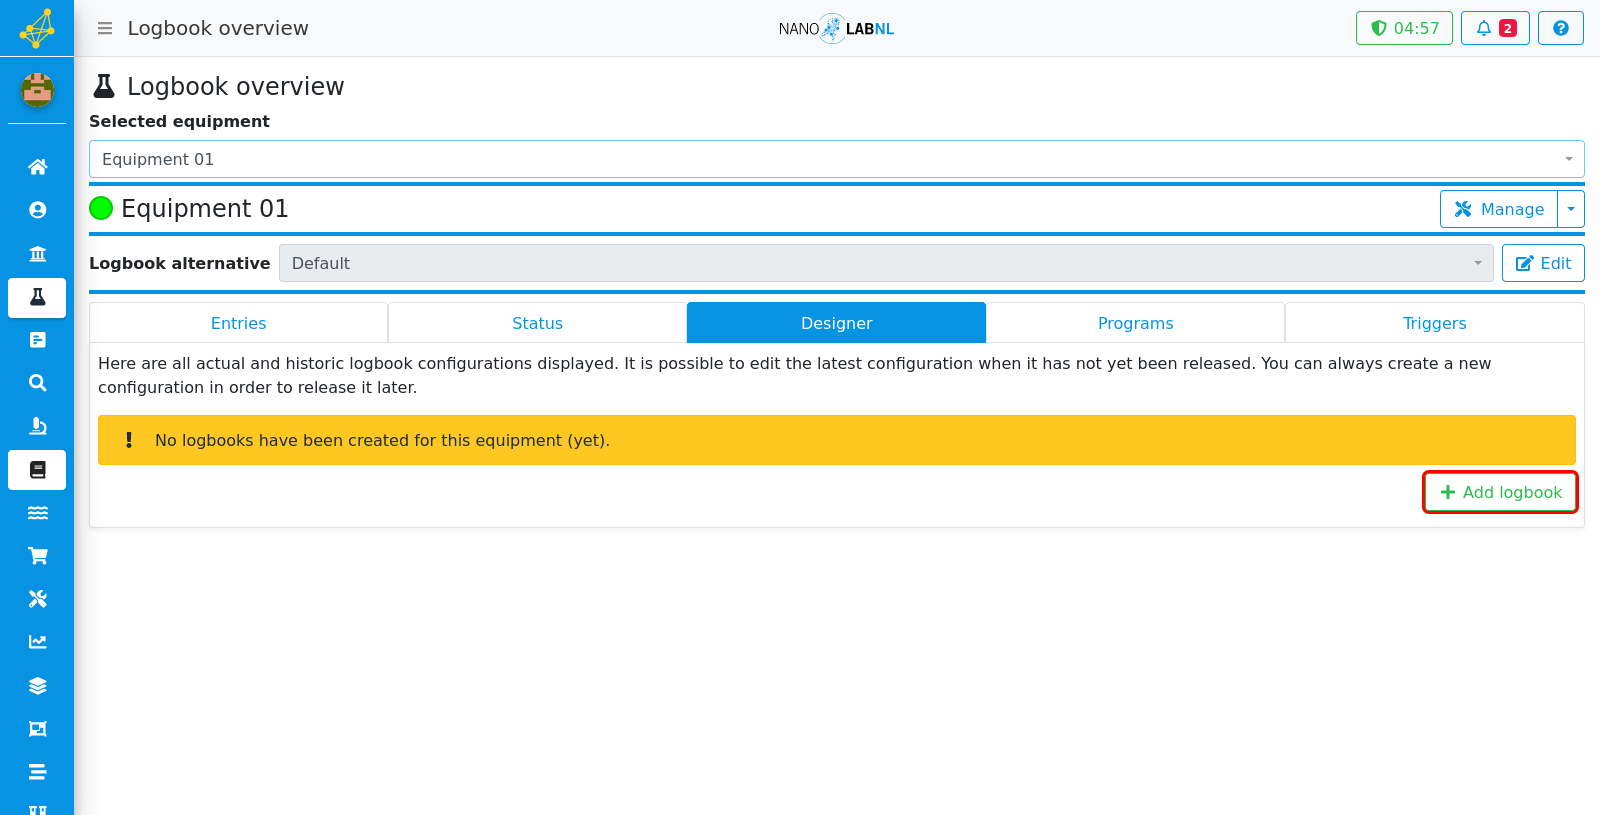
Step 5
Click on "Add logbook", to add a logbook.
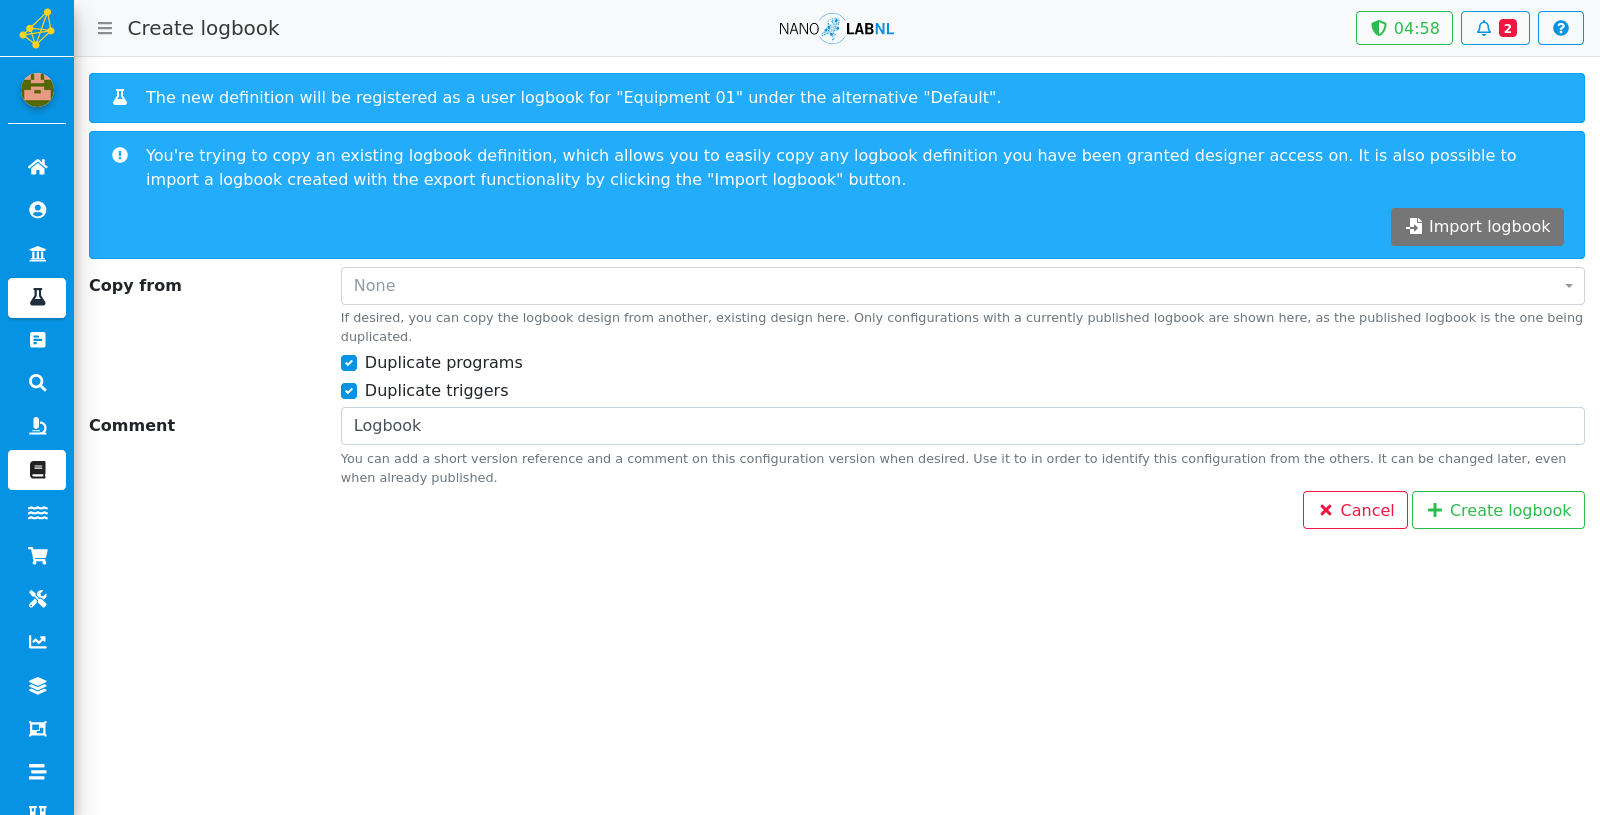
Step 6
Here an existing logbook design can be copied to start a new one or an exported design can be imported using the "Import logbook" button. A short comment can also be added to mark the configuration version.
Step 7
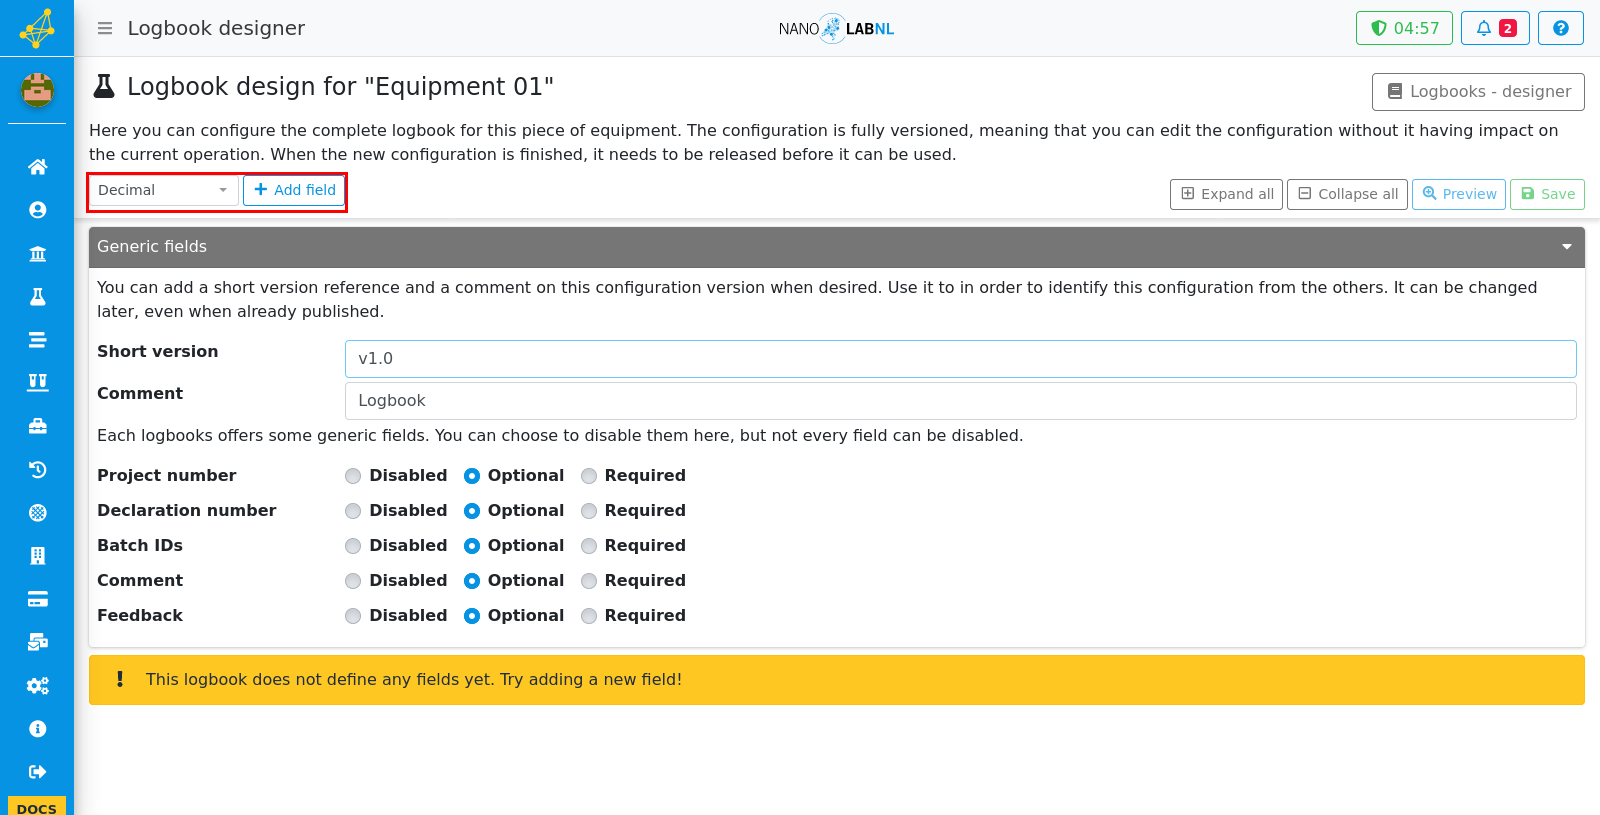
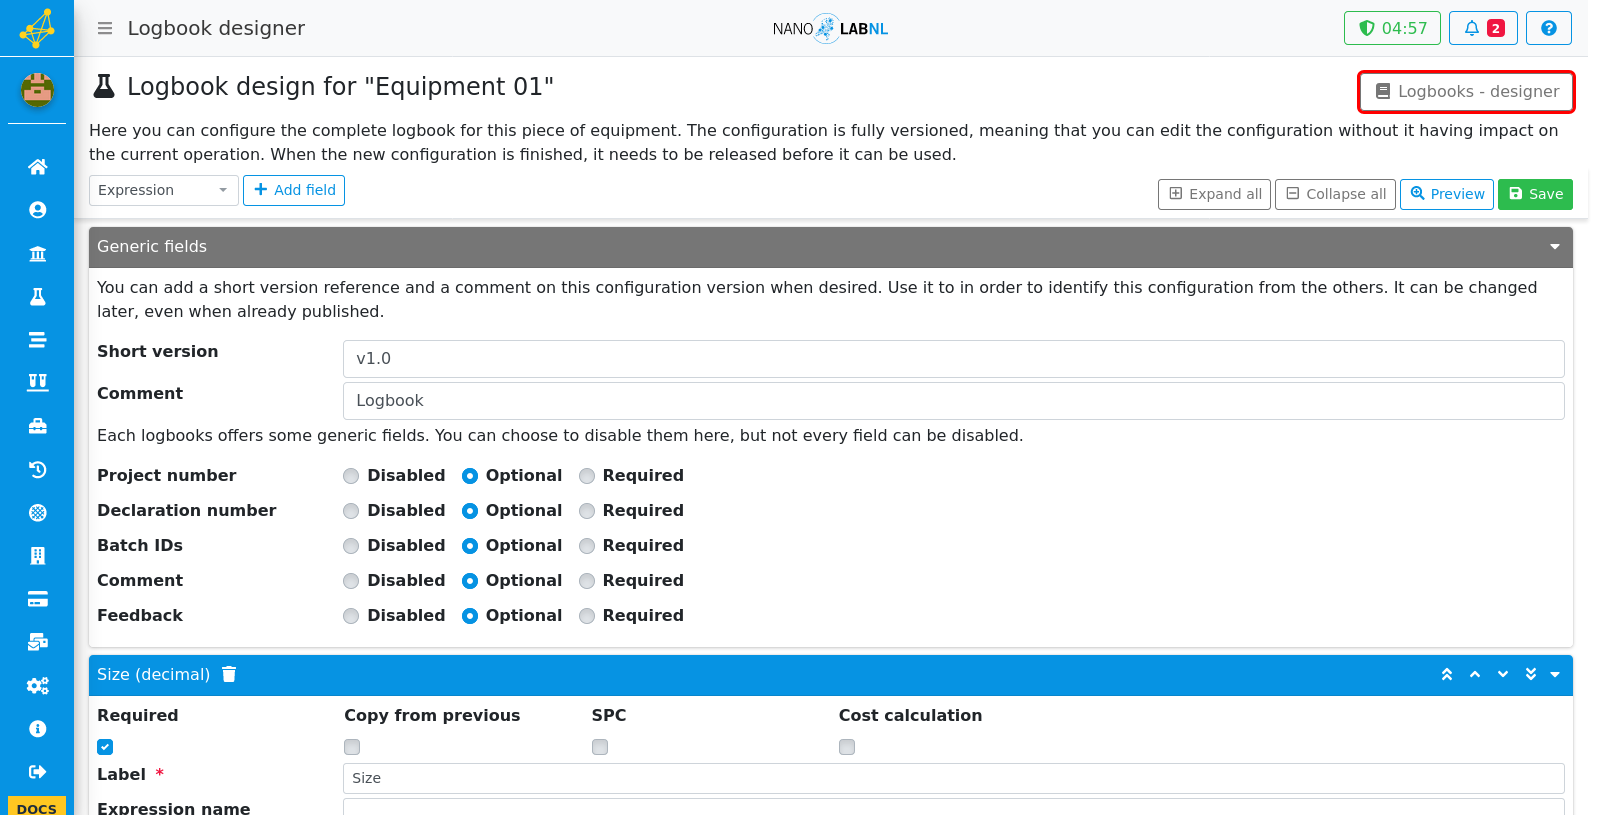
You can add a short version reference in order to make the configuration easier to recognise. There are also some special fields that can be set to disabled, optional or required.
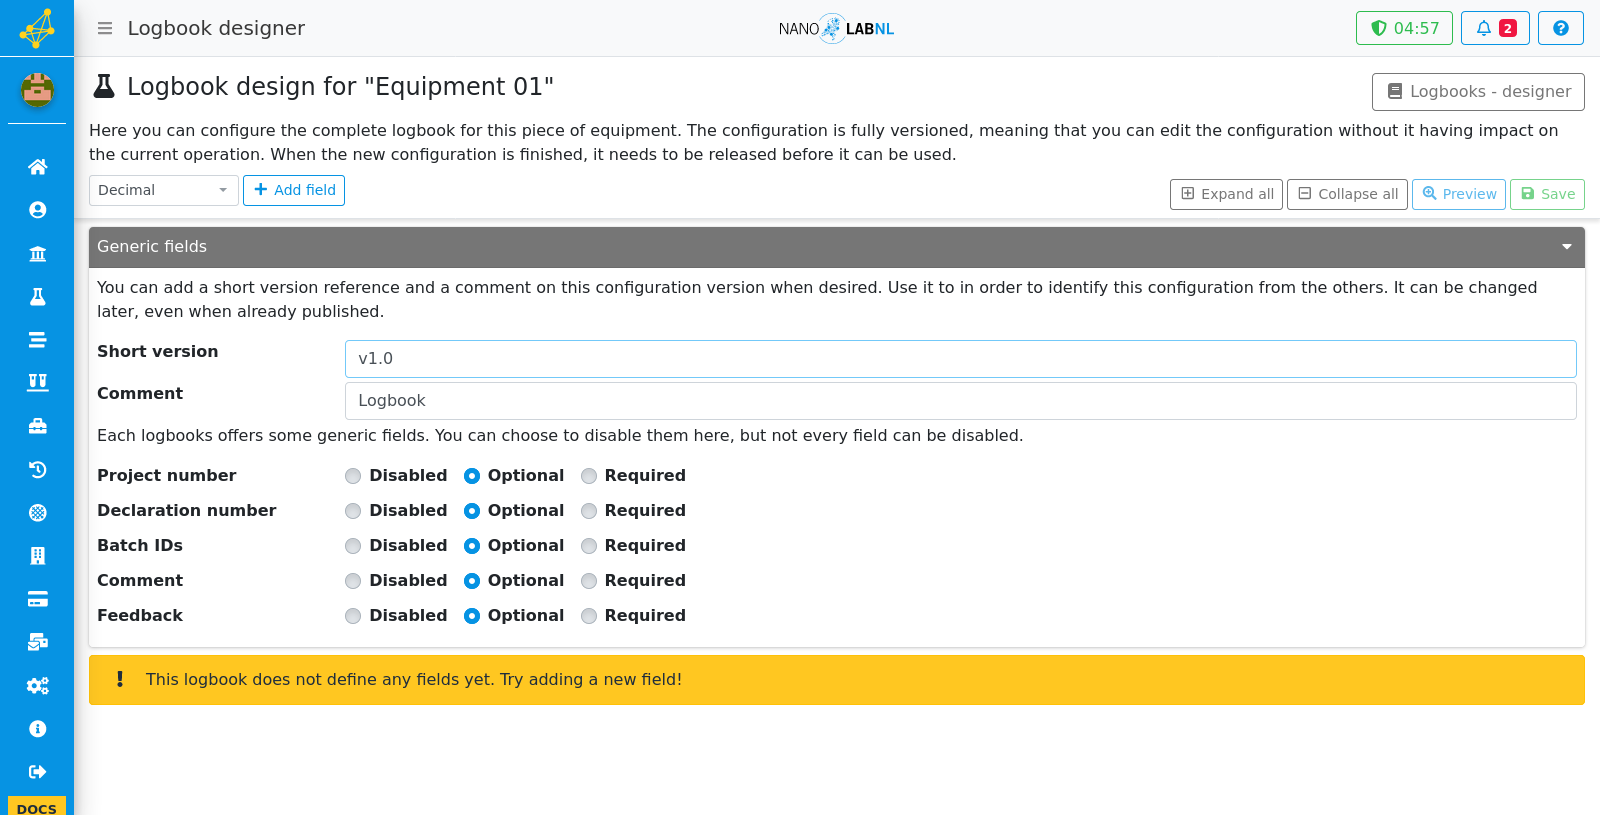
Step 8
To add a new field, select the field type with the drop down and click on "Add field".
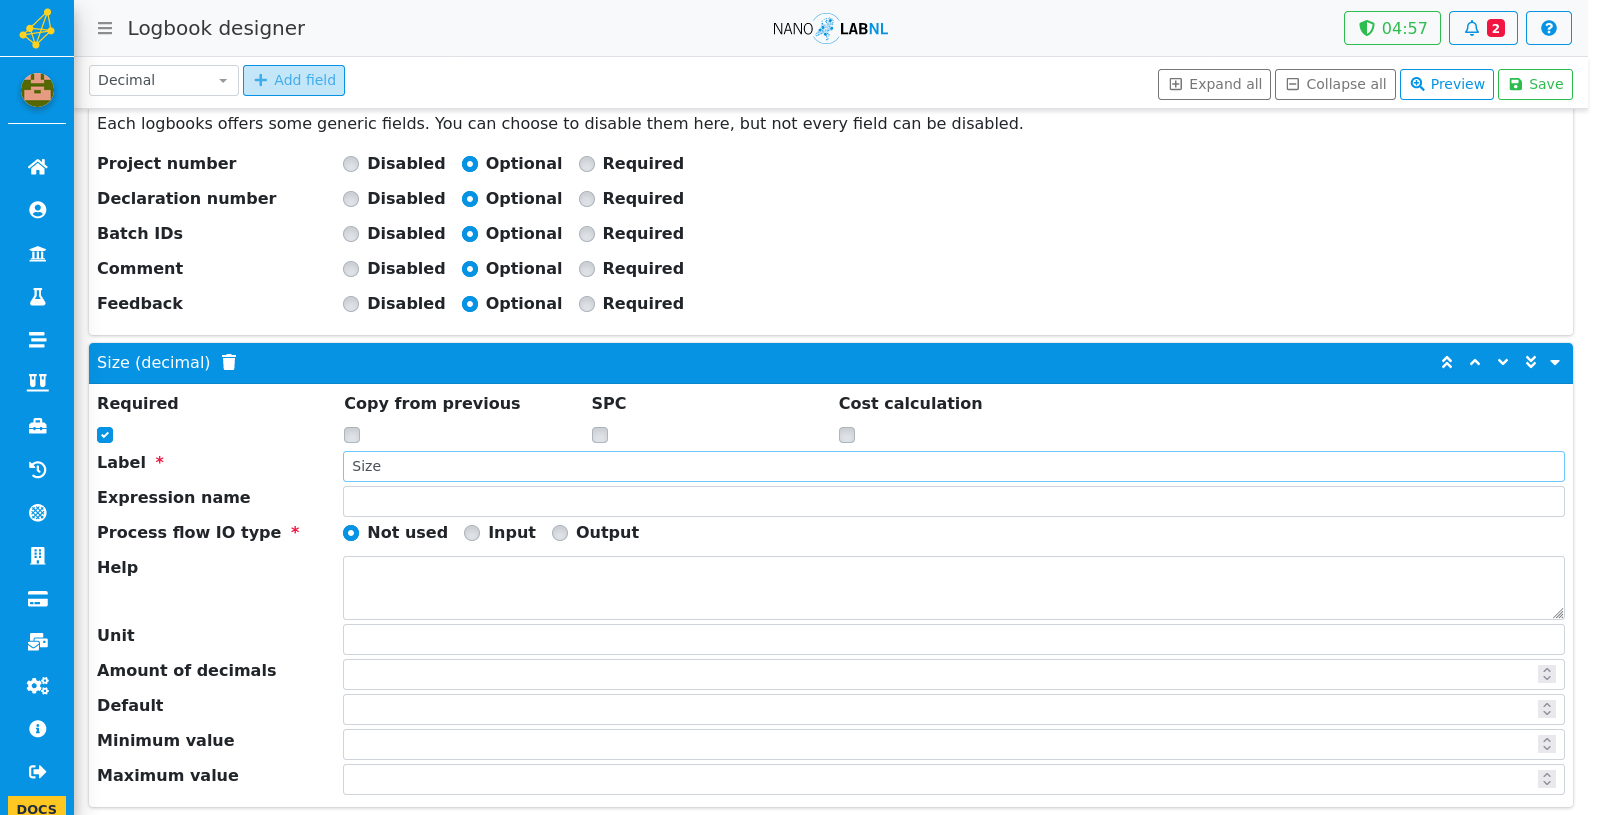
Step 9
Now the new field can be configured. First there are a couple of checkboxes. The "Required" checkbox makes the field required. The "Copy from previous" adds an option to copy the value from previous logbook entries to the field. The "SPC" option enables the value of this logbook entry to be seen in the statistical process control. The "Cost calculation" takes this value into account when a log is entered. Some extra explanation for some fields: the "Label" is required and will be the name of the field, the "Expression name" can be used to change the reference to this field in expression fields.
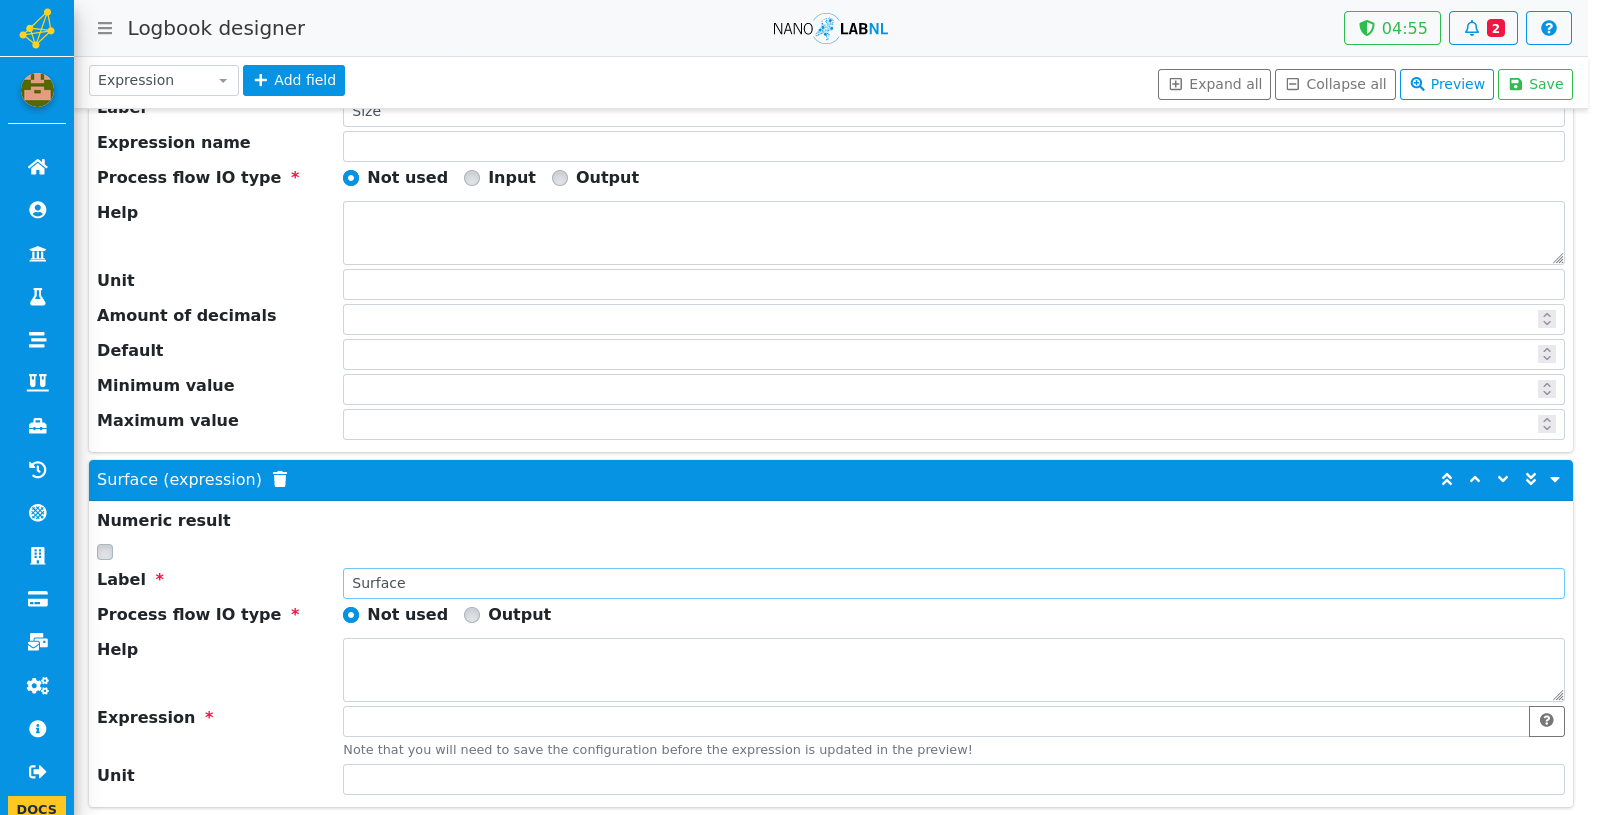
Step 10
To add an expression, select the expression field type with the drop down and click on "Add field".

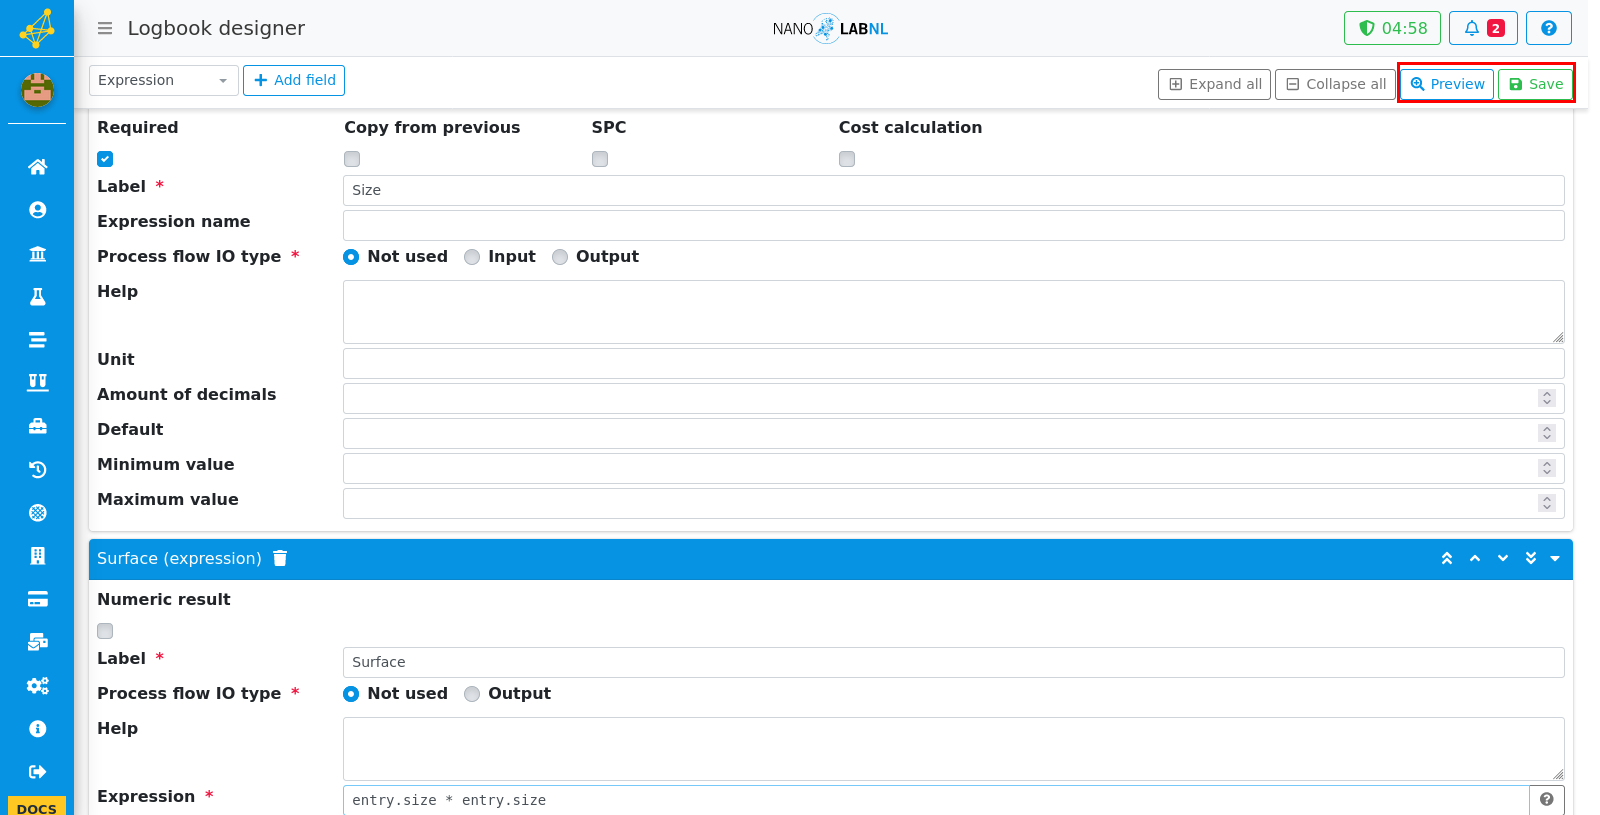
Step 11
The expression field can be used to automatically calculate a value based on the various entries of the logbook. The expression can also be marked as a numeric result, this allows the option to enable SPC or Cost Calculation to the expression.
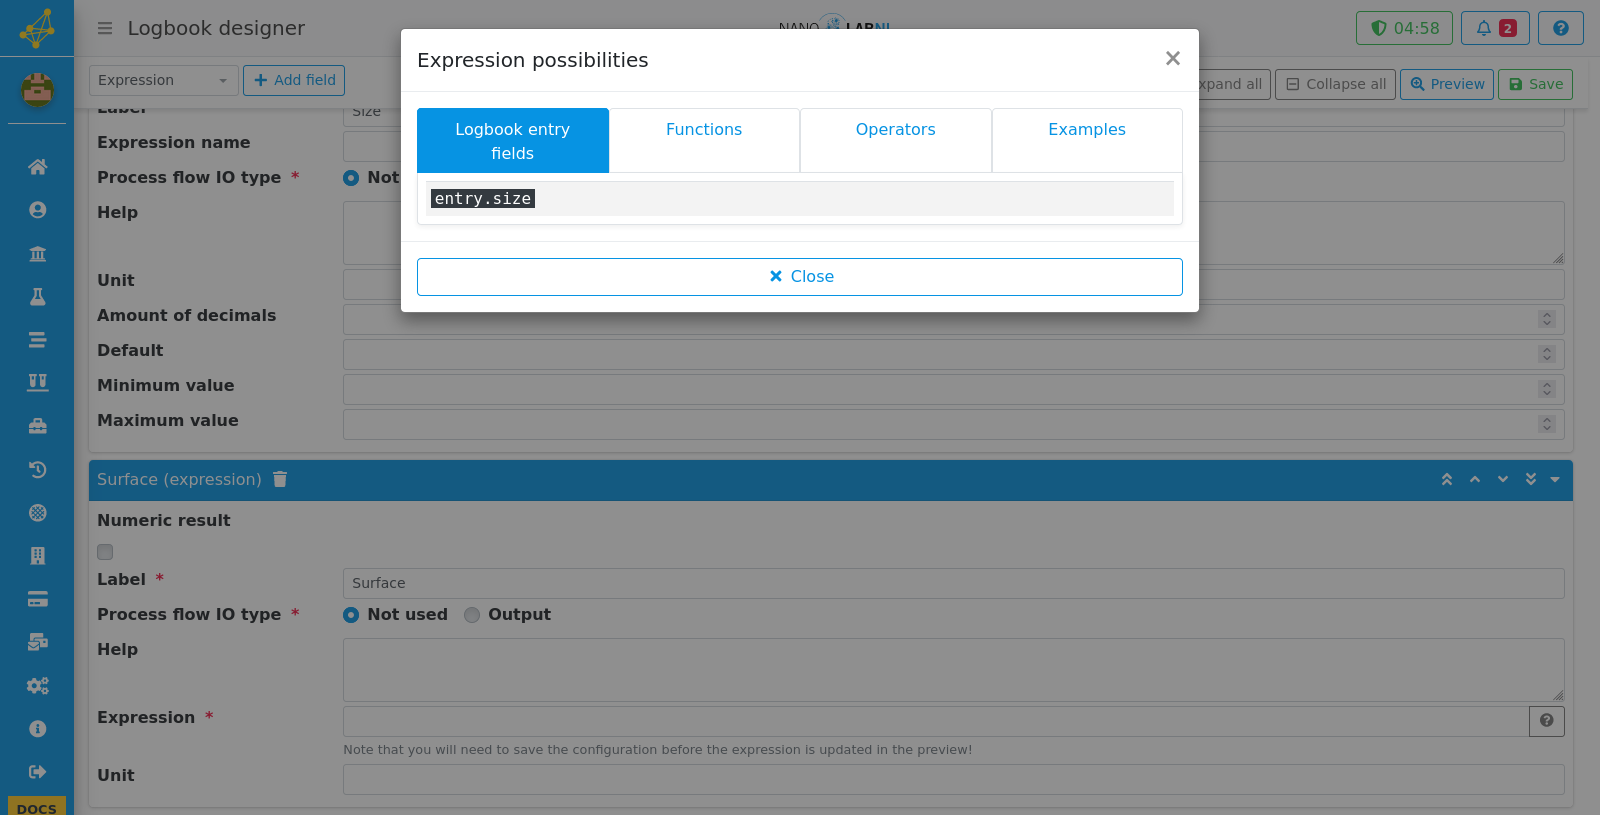
Step 12
Click on the expression questionmark button.
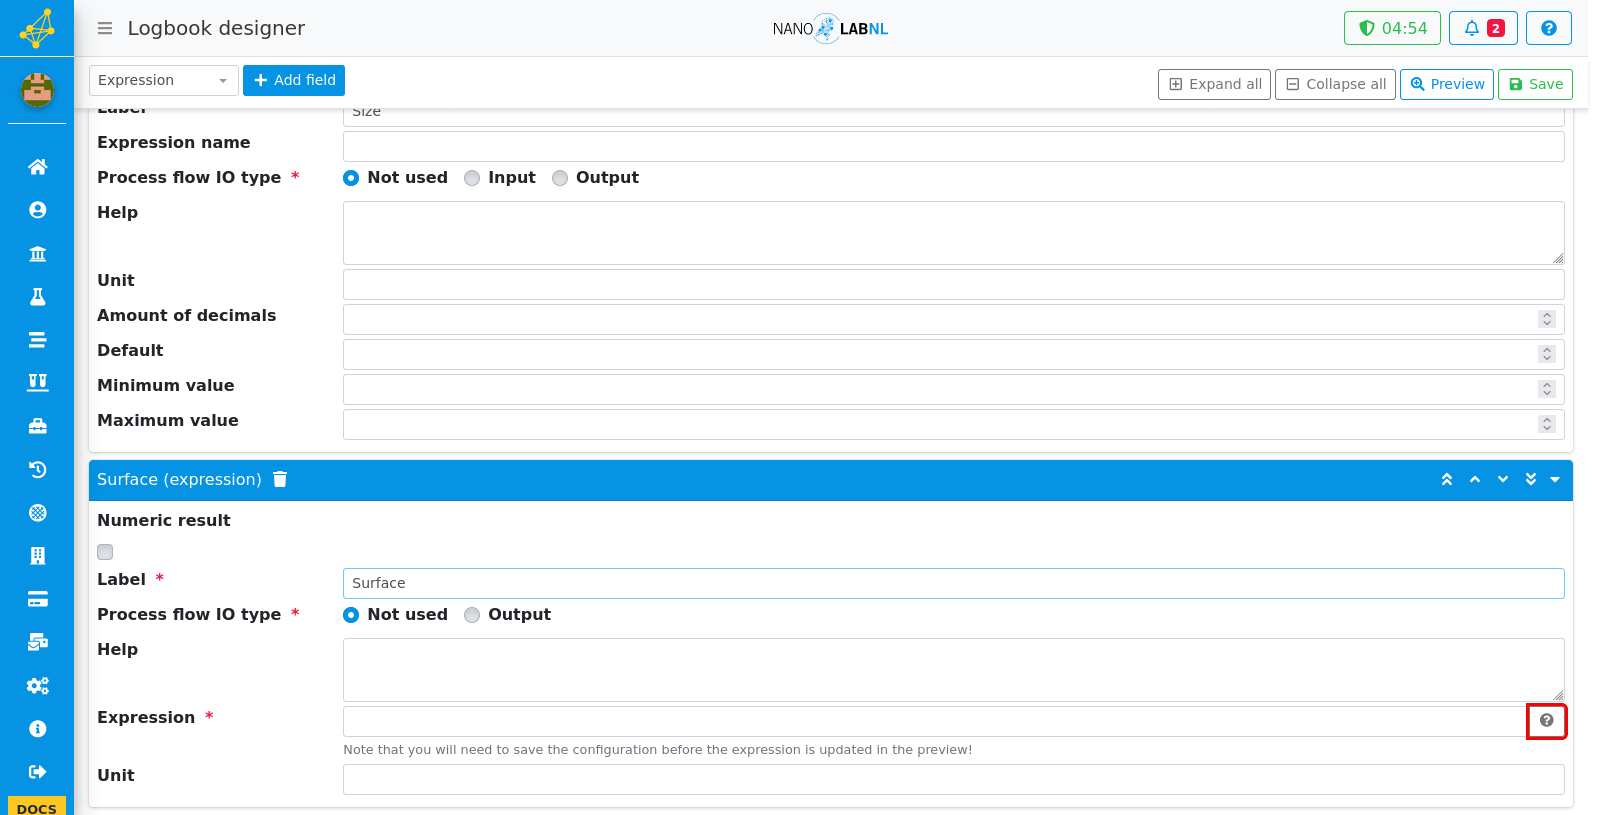
Step 13
In this window the possible expression inputs, functions, operators and examples are shown. This variables in the list of "Logbook entry fields" will refer to the other values in this logbook.
Step 14
Once your logbook design has been finished you can click the "Preview" button to check your design and you can save the design by clicking the "Save" button.
Step 15
To go back to the logbook overview, click the "Logbooks - designer" button.
Step 16
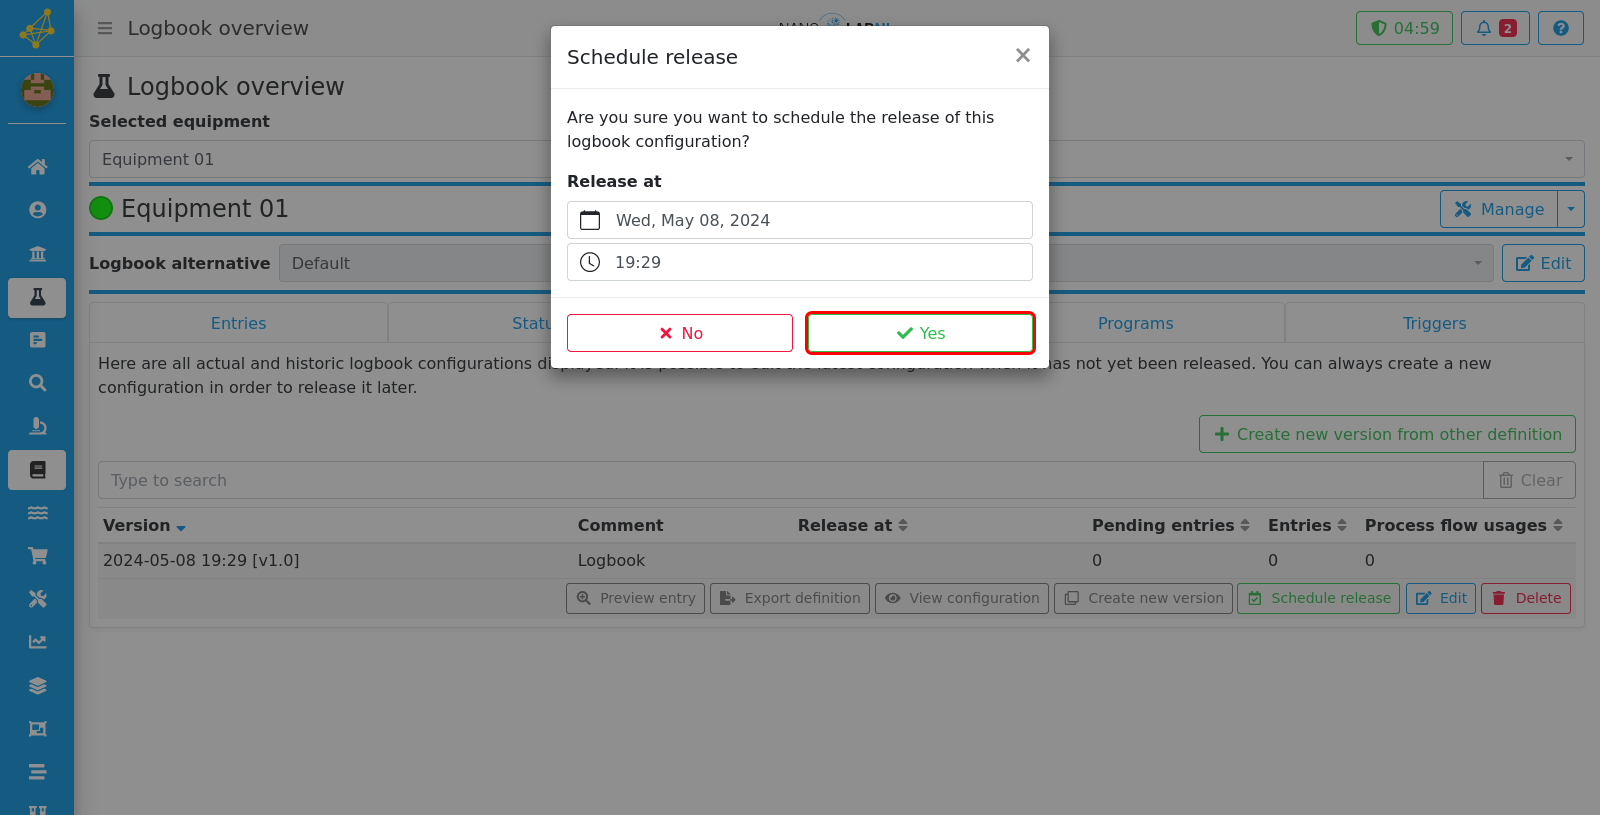
Once a new design is finished, it can be scheduled for release. This is done by pressing the "Schedule release" button.
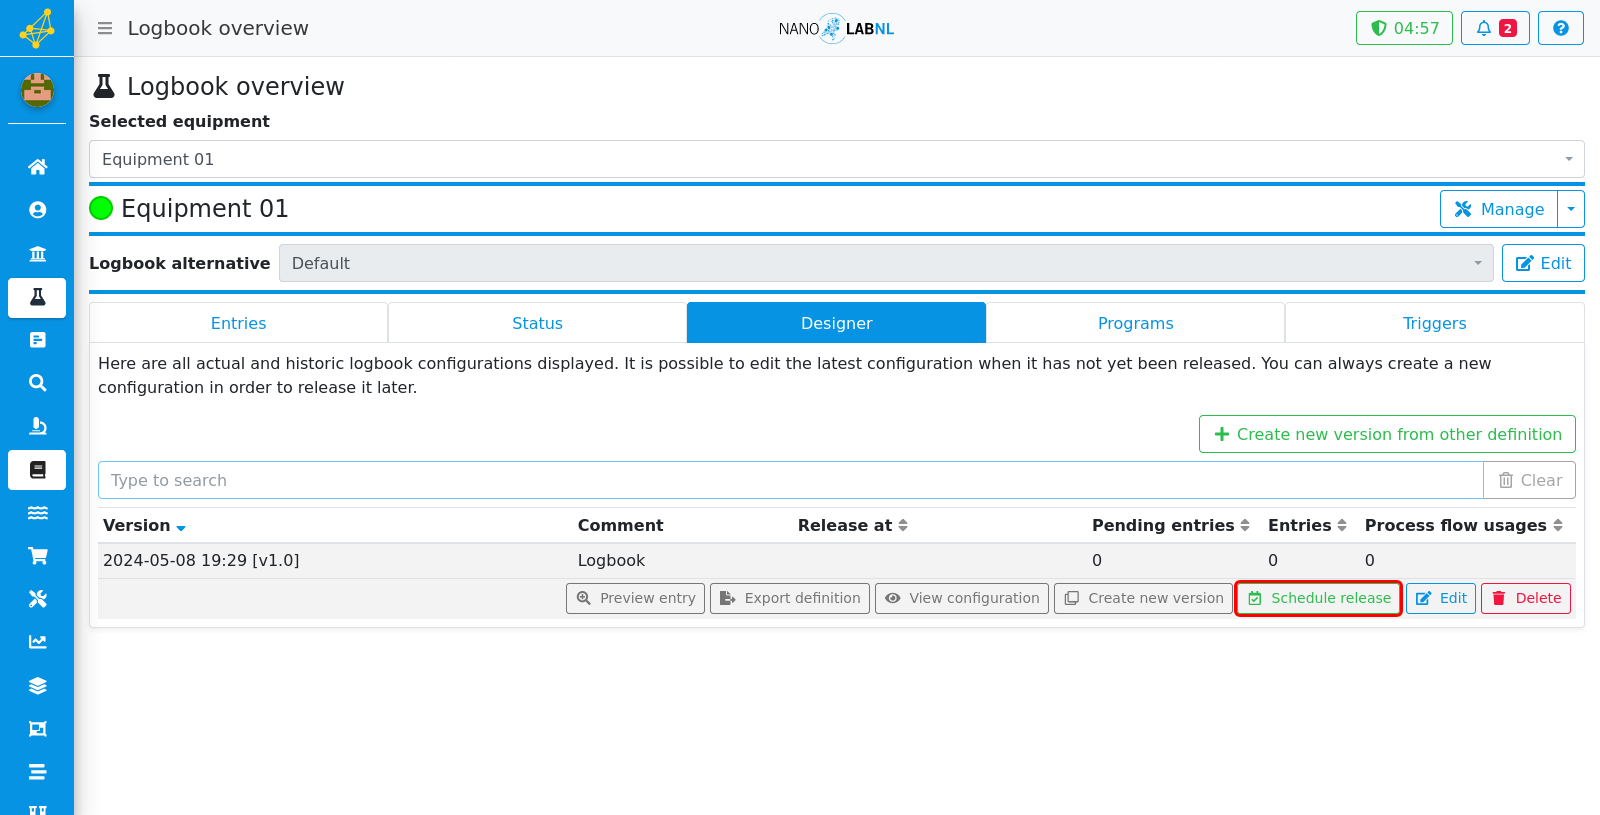
Step 17
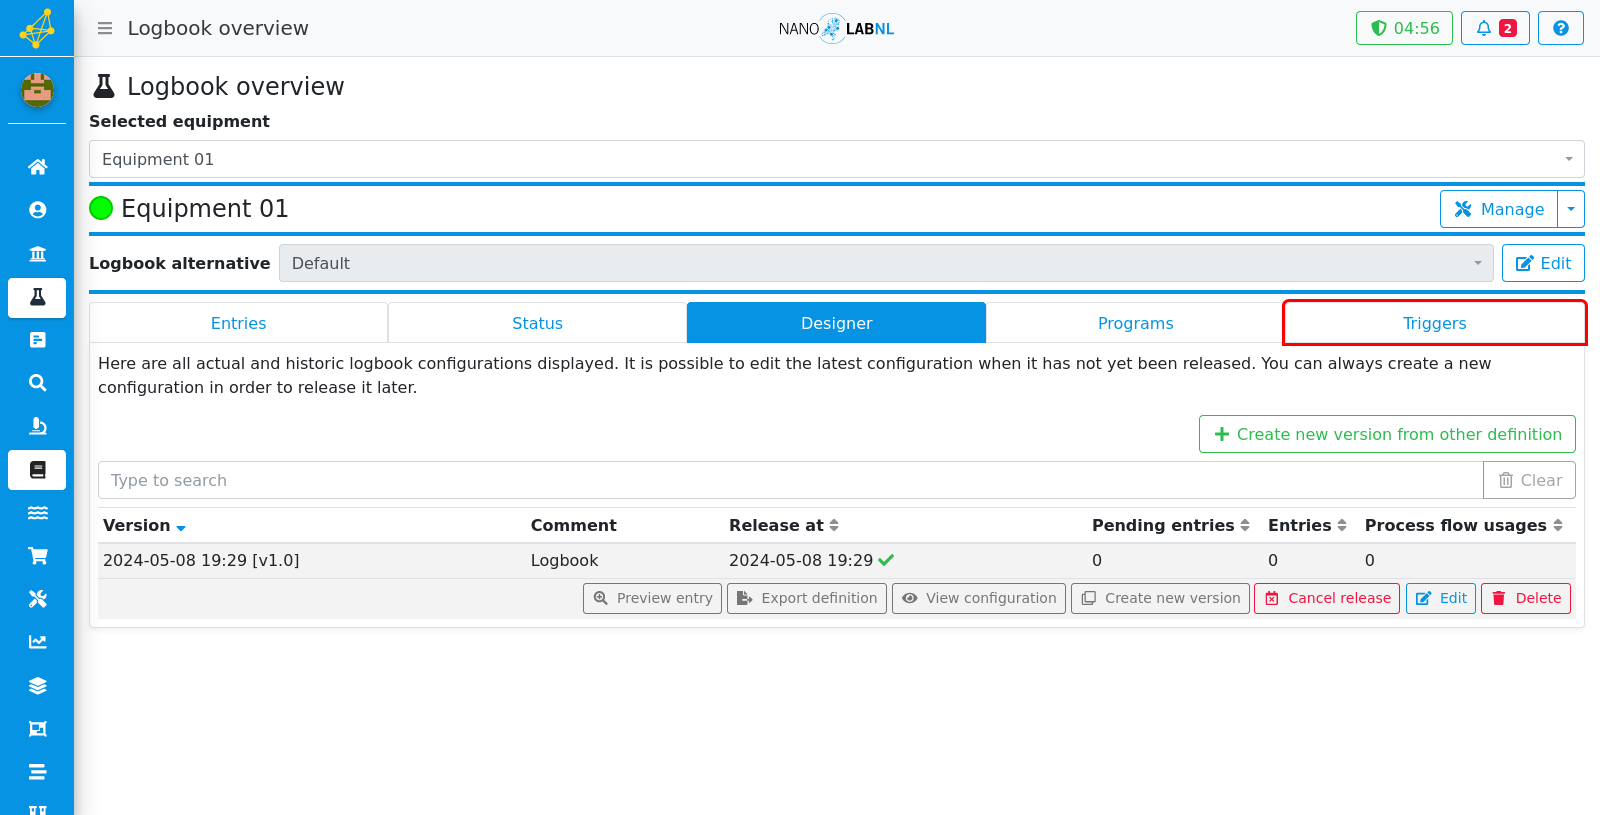
Here the release date and time can be selected. Once the logbook configuration is released, entries using this logbook can be made. The release can still be cancelled until the release.
Step 18
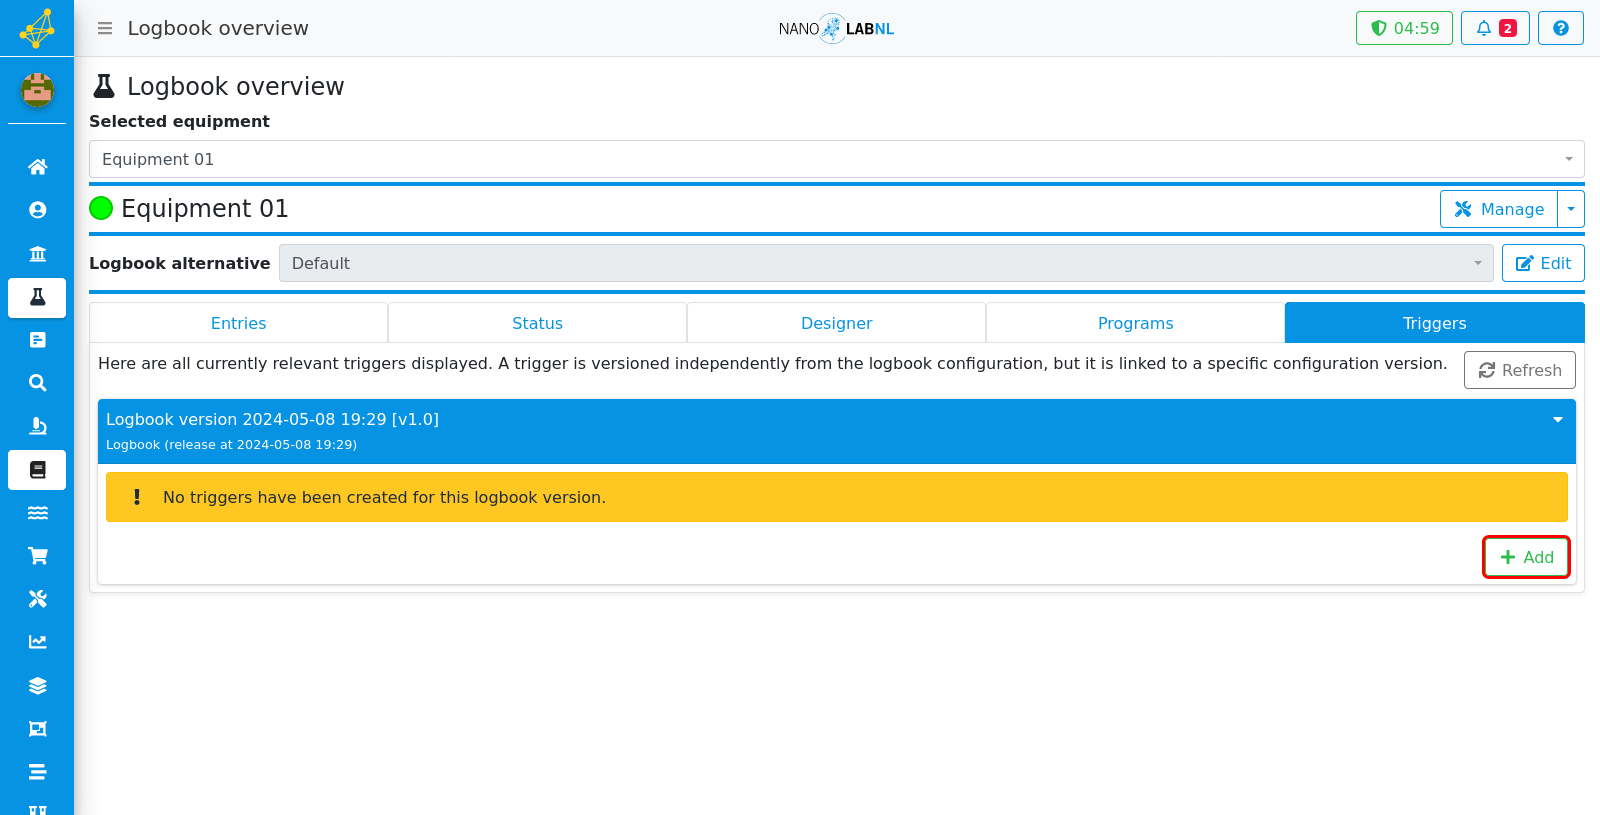
For some equipment triggers can be useful. Triggers will keep track of a certain value that can increase with every use or every day. A threshold can be set up to trigger events.
Step 19
Triggers are linked to the logbook version. When designing a new logbook version, the trigger can be copied to this version. To add a new trigger, press the "Add" button.
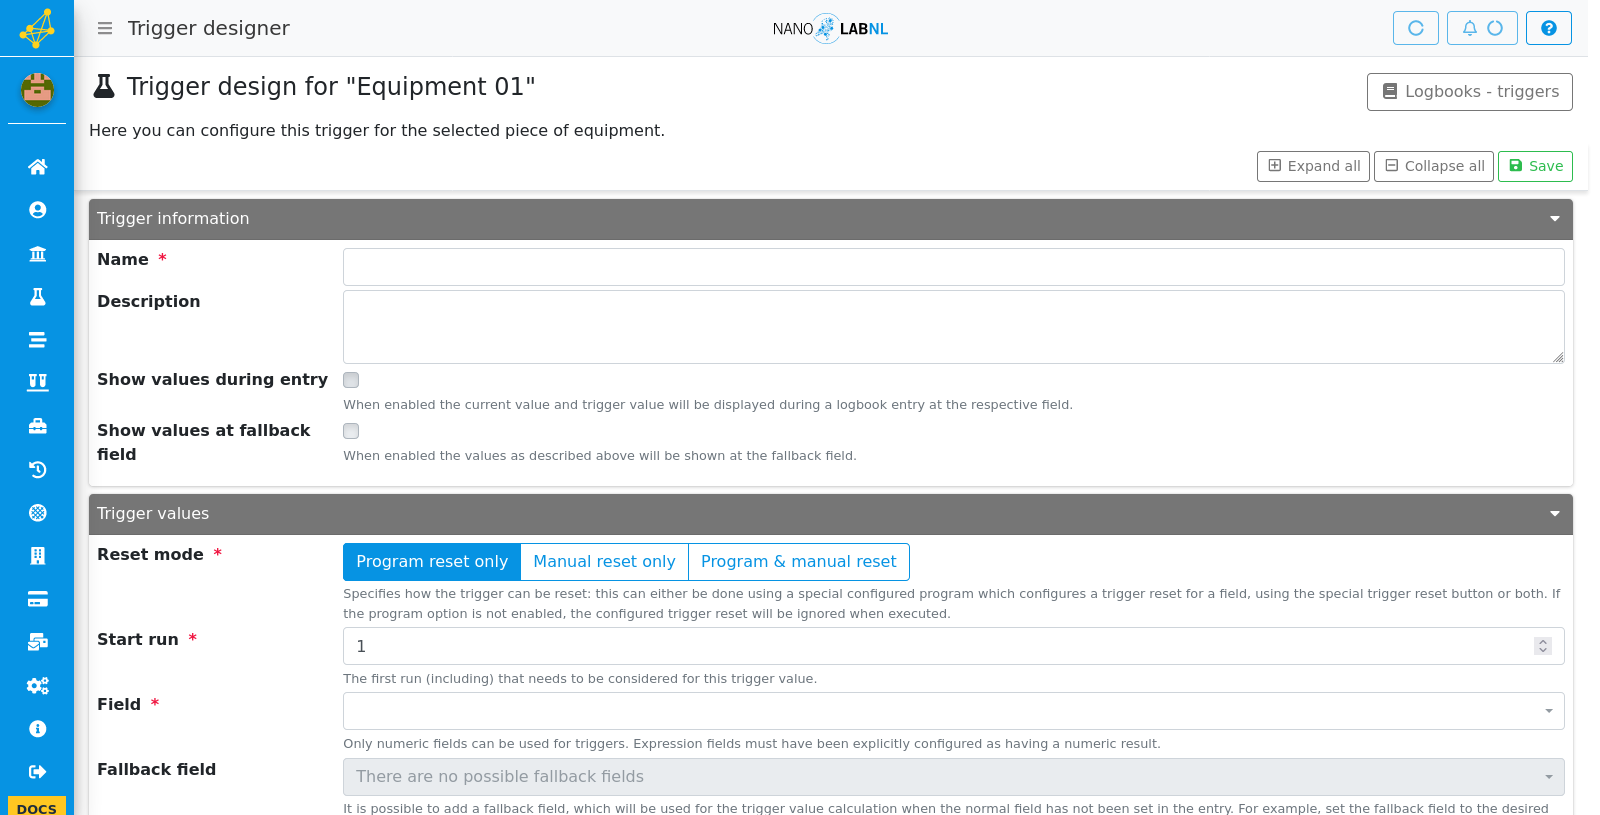
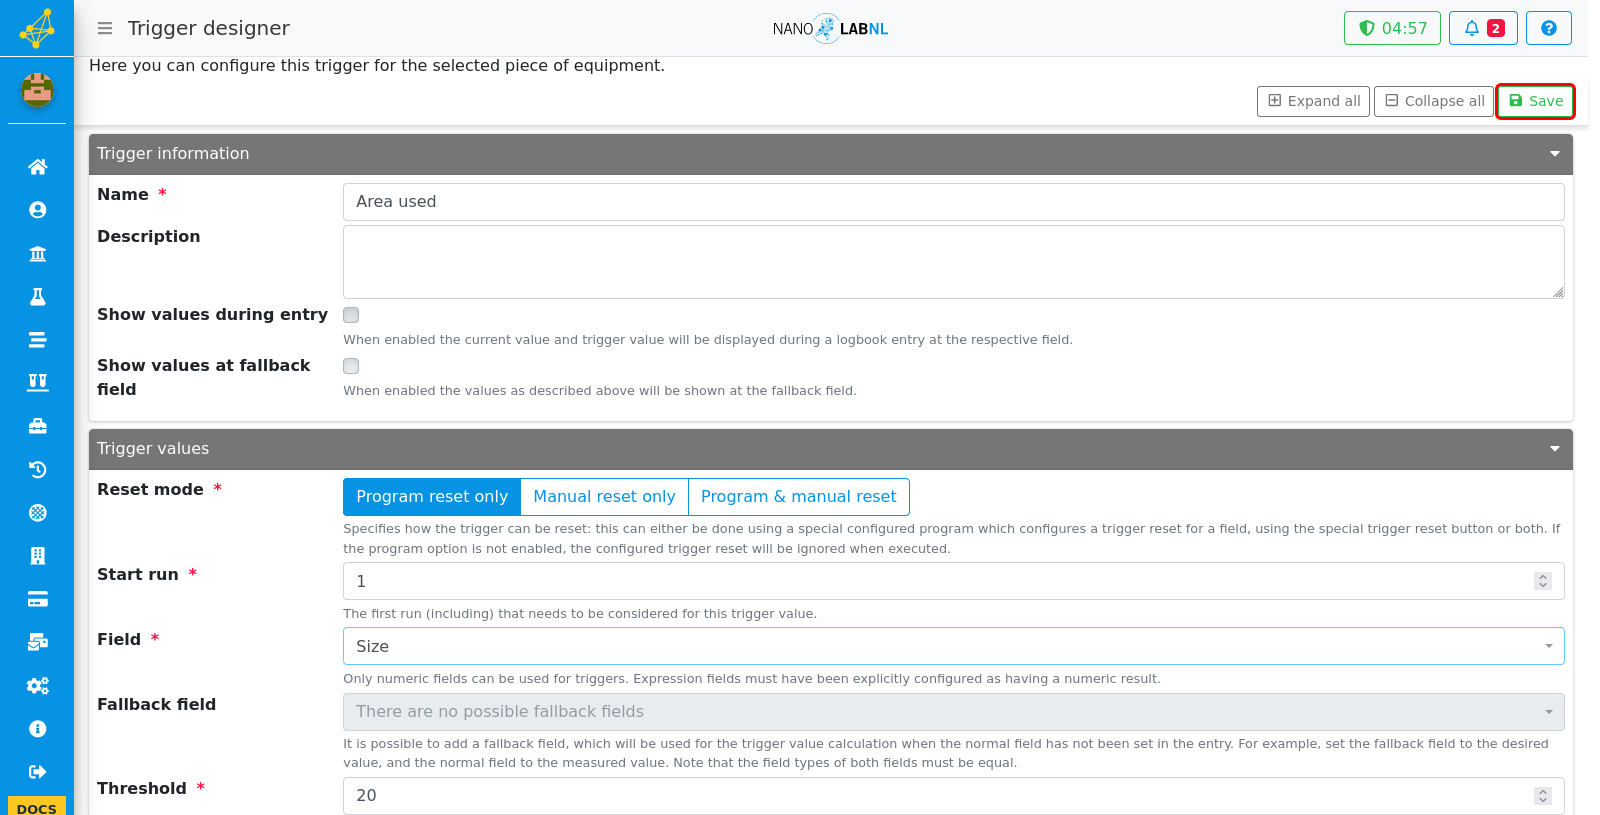
Step 20
The trigger edit screen gives a lot of options for the trigger. Next to adding some trigger information, the trigger values need to be configured. Start run: The number of the run where the trigger needs to start. Field: The field in the logbook entry that will be added trigger value. Threshold: The value at which the trigger will happen. Start value: The initial value of the trigger value. Daily usage: The amount the trigger value will increase each day.
Step 21
The user impact card can limit the users access. Specific programs can be blocked and notifications can be shown. In the notifications card it can be configured who will be notified of the trigger being triggered.
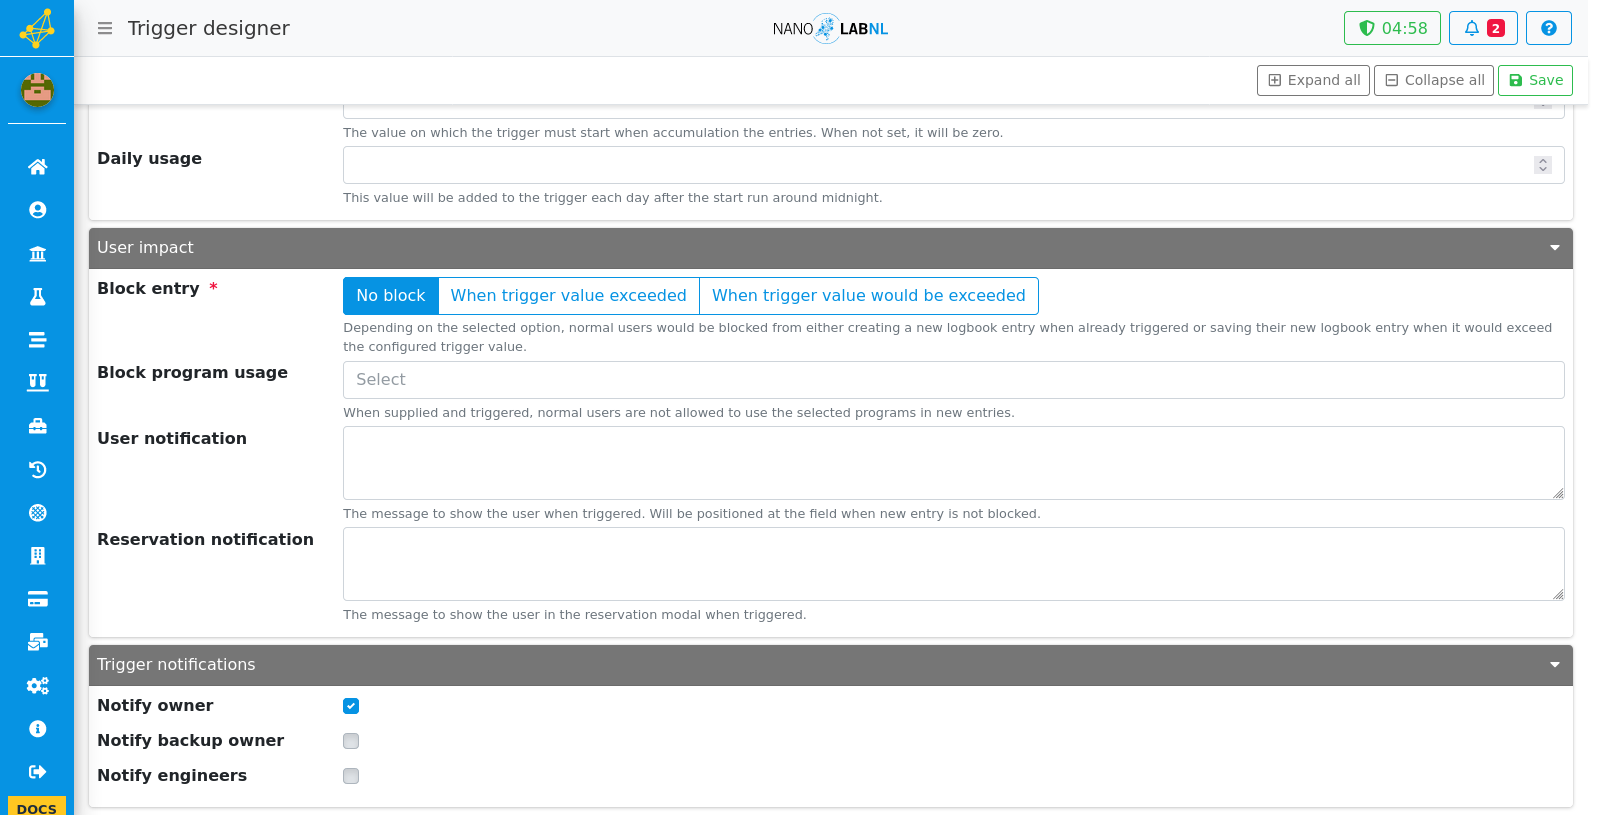
Step 22
Once your trigger is ready, you can save ot by clicking the "Save" button.
Step 23
To go back to the logbook overview, click the "Logbooks - triggers" button.

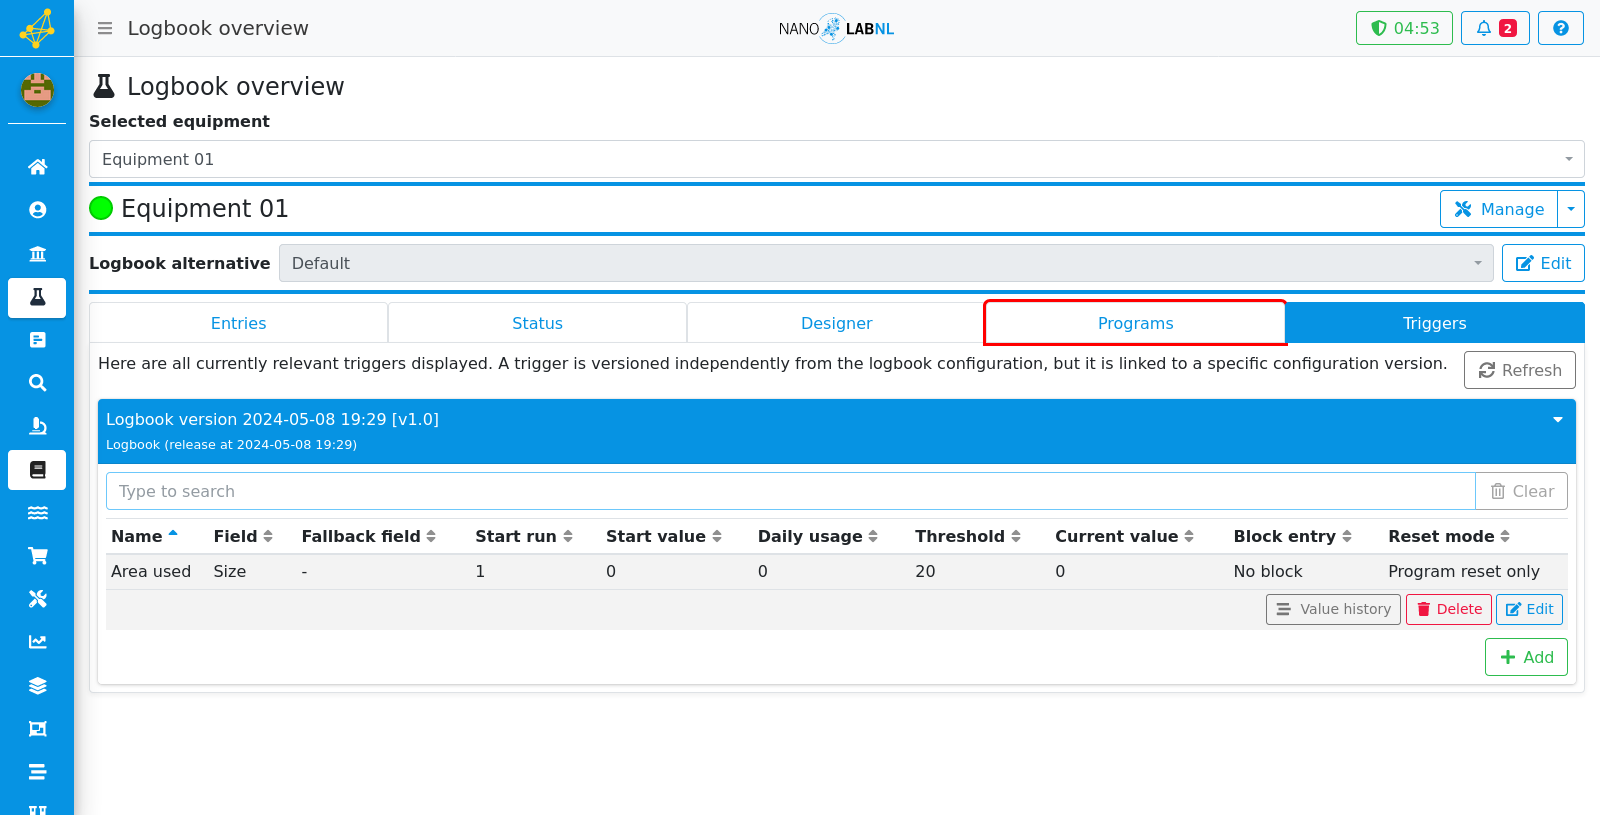
Step 24
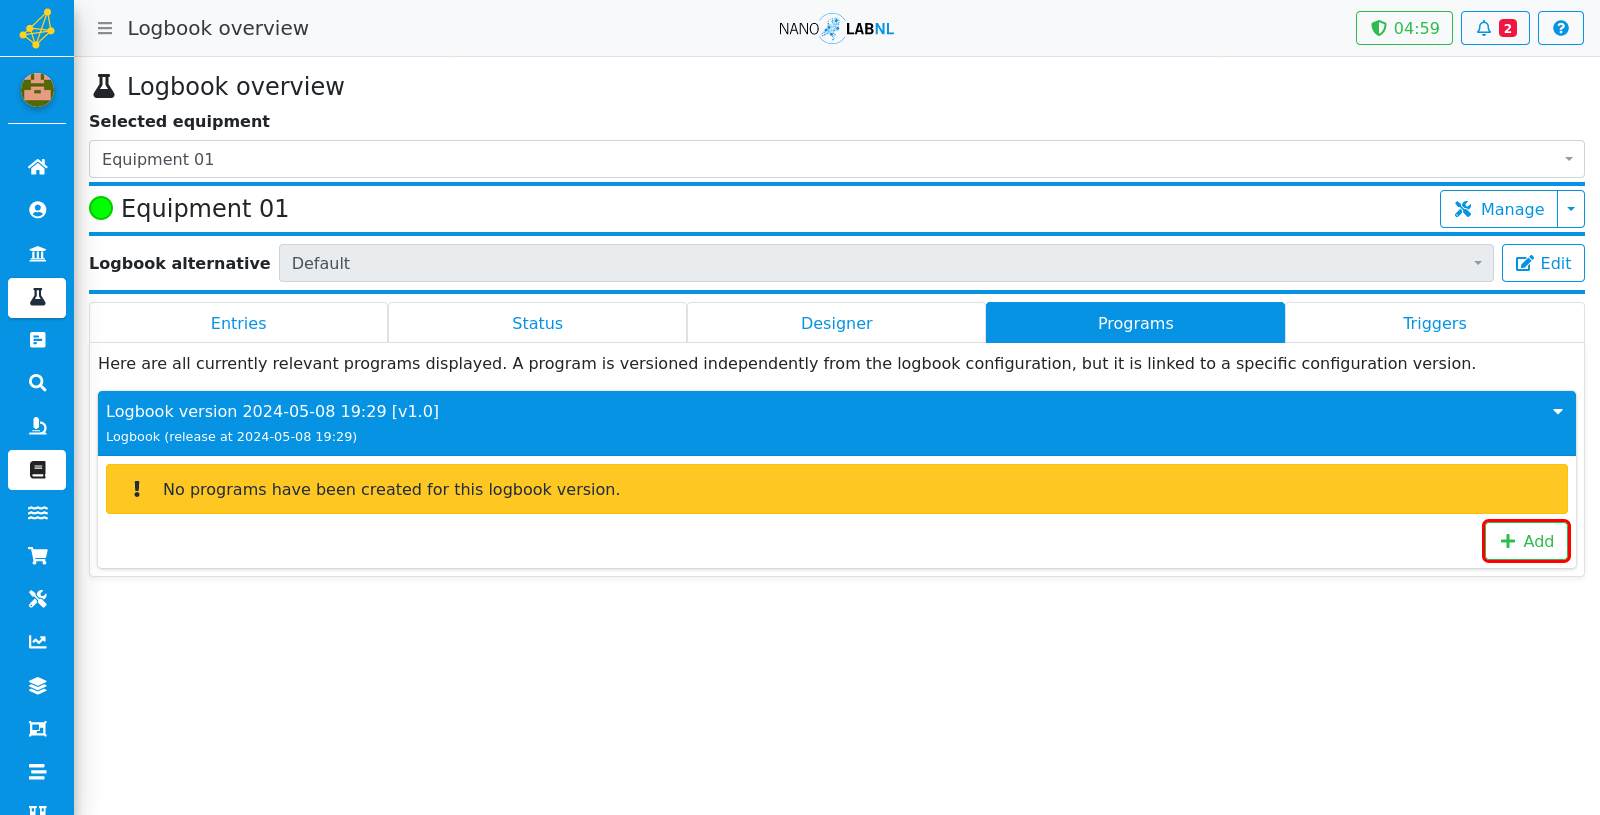
In the program tab, the available programs for the piece of equipment can be configured.
Step 25
New programs can be added via the "Add" button.
Step 26
In this window, multiple programs can be configured. A program can be used to set default values for logbook entries or provide references. It can also triggers if a program is run. In the impacted fields tab, the fields from a logbook configuration can be selected to be influencable by a program.
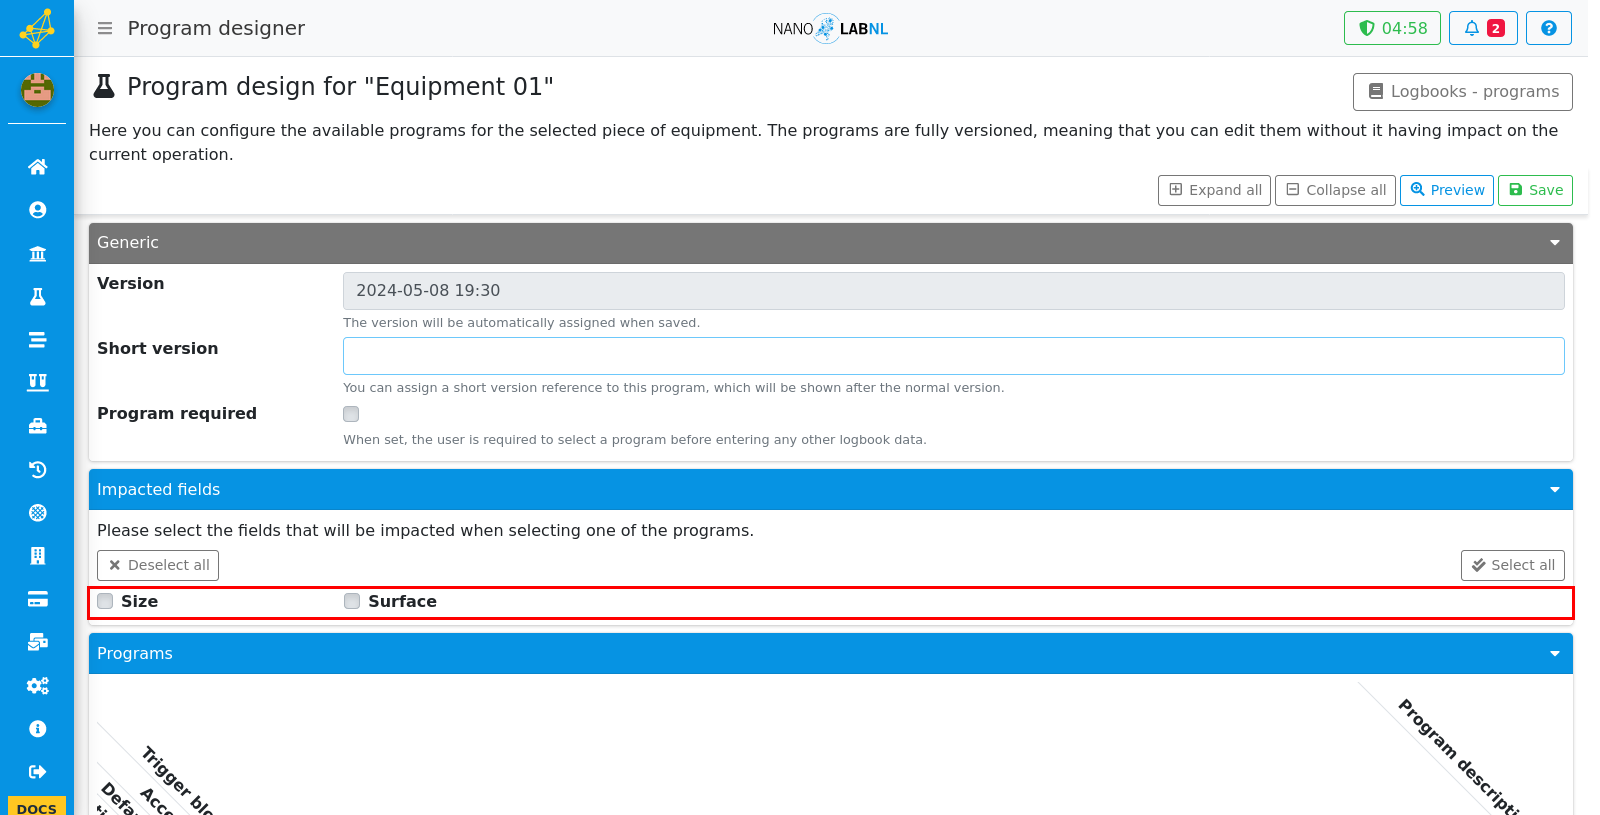
Step 27
The impacted fields will show up by the programs and can be given a default value per program. This value can also be shown as a reference or be completely hidden when filling in the logbook with this program. The trigger connected to this value can also be reset with a program.
Step 28
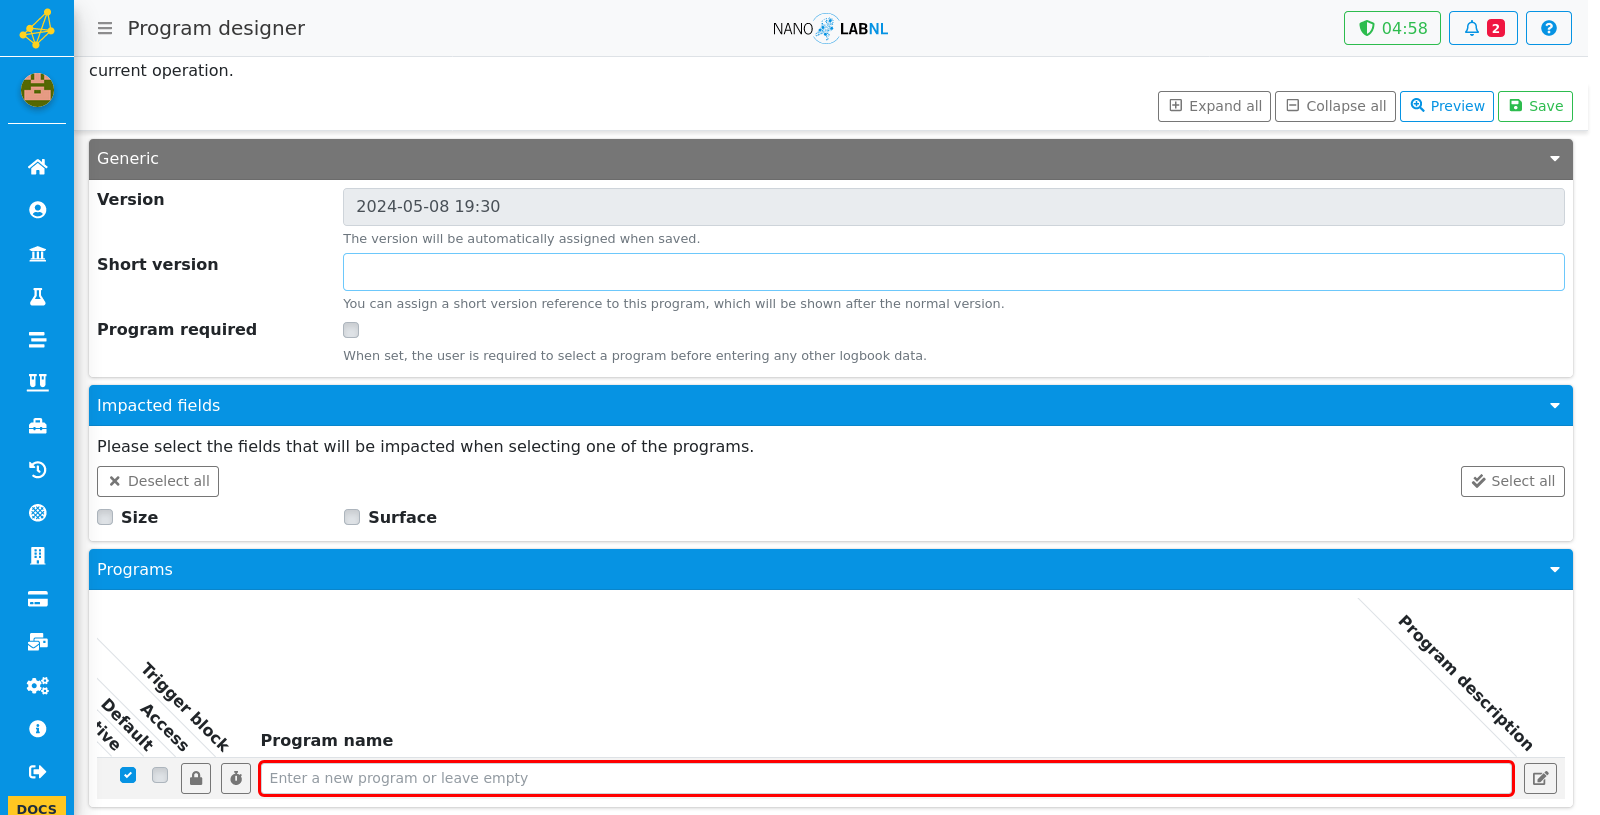
On the left side of the program name there are some more program options. Active: This determines if the program is currently active and can be used. Default: This will set this program as the default program when making an entry in this logbook. Access: This can set who has access to the program, when the button is gray, there are no restrictions. This can be narrowed down to specific user groups or owners and engineers. Trigger block: Triggers can be choosen that will block the use of this program when one of the triggers has been triggered
Step 29
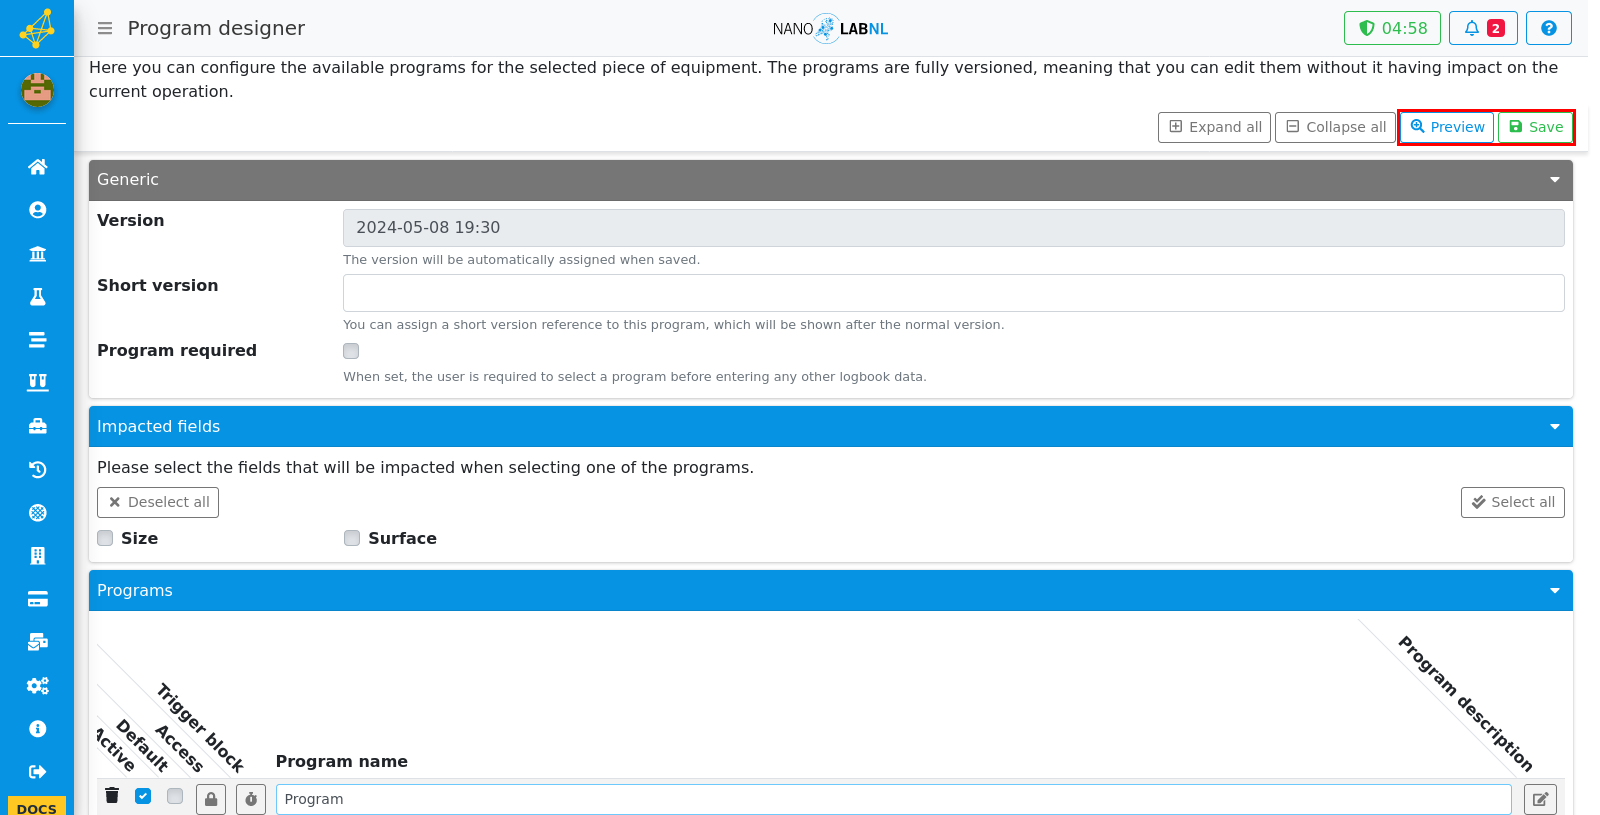
Once all programs are configured you can click the "Preview" button to check the program in the logbook and you can save the programs by clicking the "Save" button.
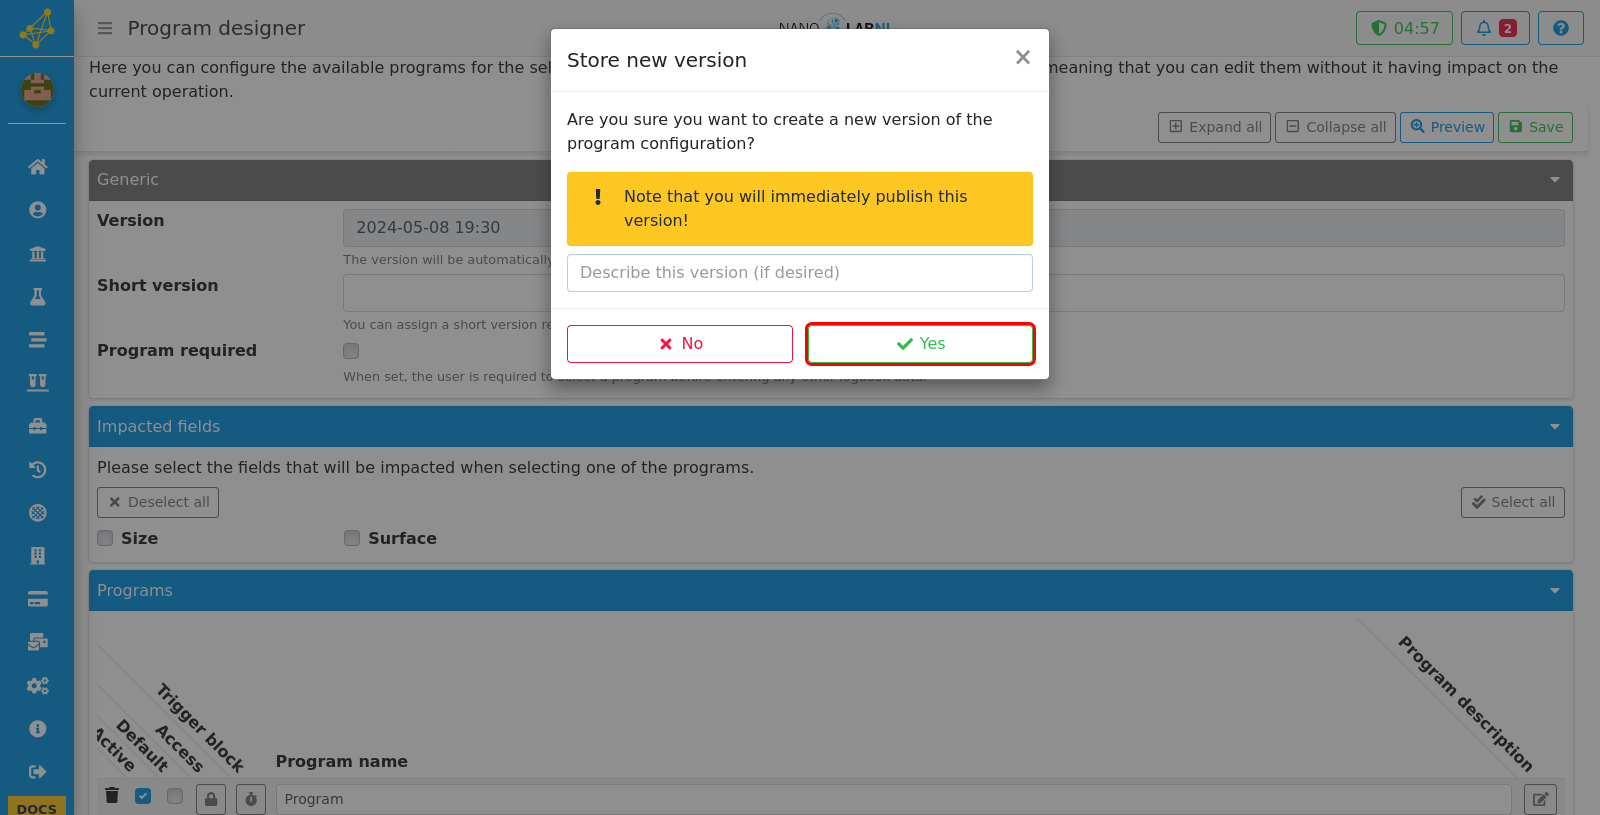
Step 30
Now the new program version can be given a description and saved.